Apr 3, 2021 | Desserts
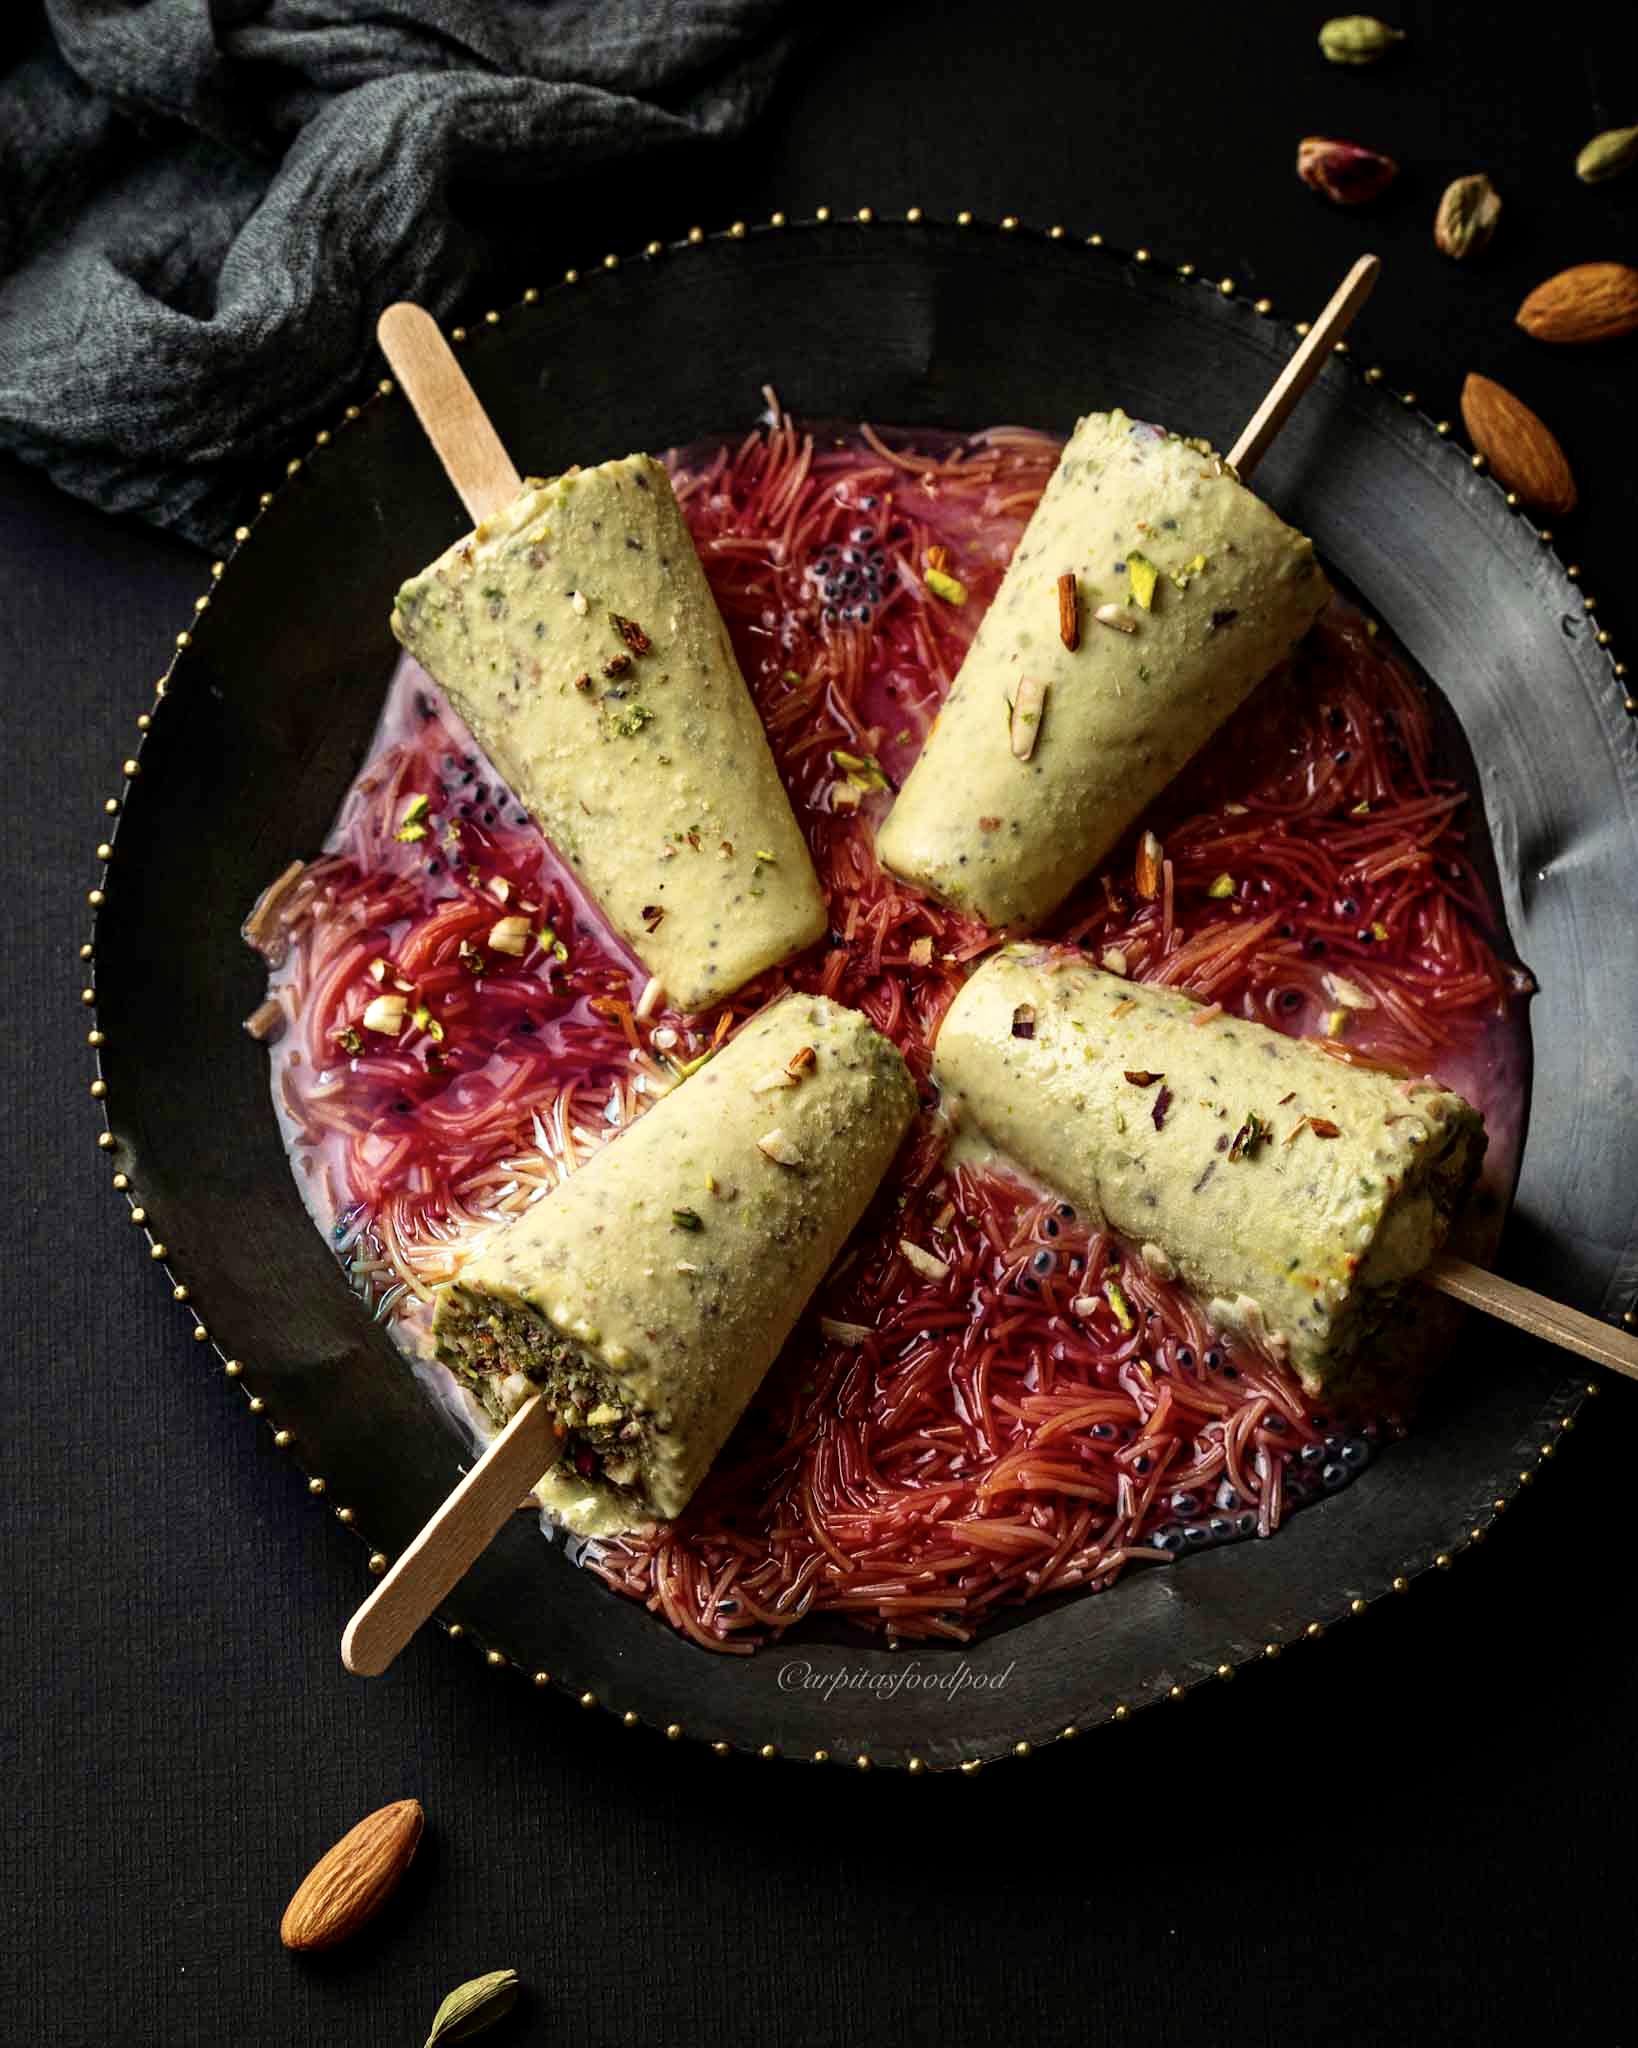
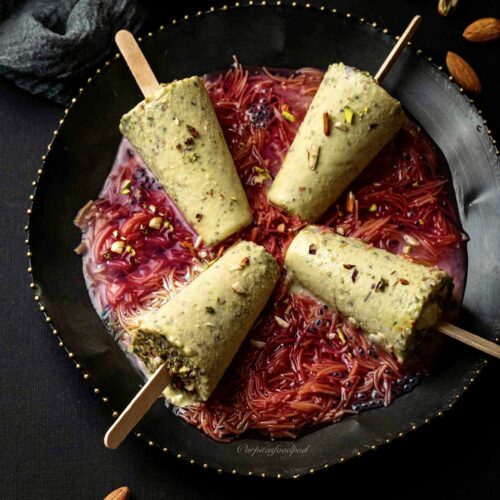
Kesar Badam Pista Kulfi
A total bliss on a summer afternoon or indulge with family and friends to celebrate an occasion. Made by slow cooking milk until it thickens into a luscious Rabri texture, loaded with nuts and beautifully fragrant with saffron and cardamom, this recipe is a keeper. The secret of making a good kulfi is slow cooking the milk in an iron pan.
I have very fond memories of indulging in this delicacy with my cousins and sibling during our trips to maternal grandparents place during holidays and festivals. We would all get pocket money from our grandparents to buy chocolates and ice creams but this being the favourite of all, every penny was spent on it.
When I made this, the husband said it refreshed all this fond childhood memories too 😀.
How to make it?
In an iron pan, boil 750 ml milk. Once it comes to a boil, reduce flame, stir well and add 1/4 cup cream. Let it simmer on medium low flame for 20 mins. Keep stirring in frequent intervals. The milk starts reducing, now add 3 tbsps sugar and let it simmer for 5 mins. Muddle 6-7 saffron stands with a tsp of hot milk from the pan and add it back to the pan. Add the 1/3 cup crushed nuts (adjust quantity as per preference). Taste and adjust sugar if needed. Let it simmer for another 10 mins or until the milk thickens further (coats the back of the spoon). To quicken this process, add the cornflour slurry (mix 1 tsp cornflour with 3 tbsp water) and keep stirring. Take it off the flame, let it cool completely. Add some crushed nuts at the bottom of the mould, pour in the kulfi mix, cover with lid or foil and let it freeze for an hour. After an hour, insert icecream stick and top it up with more crushed nuts. Cover and again freeze for at least 5 hours or until set. To unmould, dip the mould in normal water for 15 seconds. Serve with sabja and falooda.
If you try this kesar badam pista recipe please tag me on your social media or write to me here in the comments, I would be really happy to know about your re-creations. You can also connect with me on my Instagram or Facebook handle.
You may also like –
Rice Kheer
Kesar Badam Pista Kulfi
Arpita Darooka
Summer kulfi recipe
Cook Time 35 minutes mins
Freezing Time 6 hours hrs
Total Time 6 hours hrs 35 minutes mins
Course Dessert
Cuisine Indian
- 750 Ml Full fat milk
- 1/4 Cup Cream
- 3 Tbsp Sugar
- 6-7 Strands Saffron
- 1/3 Cup Almonds and Pistachios Crushed
- 1 Tsp Cornflour mixed with 3 tbsp water Optional
To serve
- Sabja (basil seeds) Soaked
- Cooked Falooda soaked in rose syrup
In an iron pan, boil milk. Once it comes to a boil, reduce flame, stir well and add cream. Let it simmer on medium low flame for 20 mins. Keep stirring in frequent intervals.
The milk starts reducing, now add sugar and let it simmer for 5 mins.
Muddle the saffron stands with a tsp of hot milk from the pan and add it back to the pan.
Add the crushed nuts (adjust quantity as per preference).
Taste and adjust sugar if needed. Let it simmer for another 10 mins or until the milk thickens further (coats the back of the spoon). To quicken this process, add the cornflour slurry and keep stirring.
Take it off the flame, let it cool completely.
Add some crushed nuts at the bottom of the mould, pour in the kulfi mix, cover with lid or foil and let it freeze for an hour.
After an hour, insert icecream stick and top it up with more crushed nuts. Cover and again freeze for at least 5 hours or until set.
To unmould, dip the mould in normal water for 15 seconds. Serve with sabja and falooda.Enjoy!!!
If popsicle moulds are not available, use steel glasses or small bowls.
Keyword Kesar badam pista kulfi, indian popsicles
Apr 1, 2021 | Mains
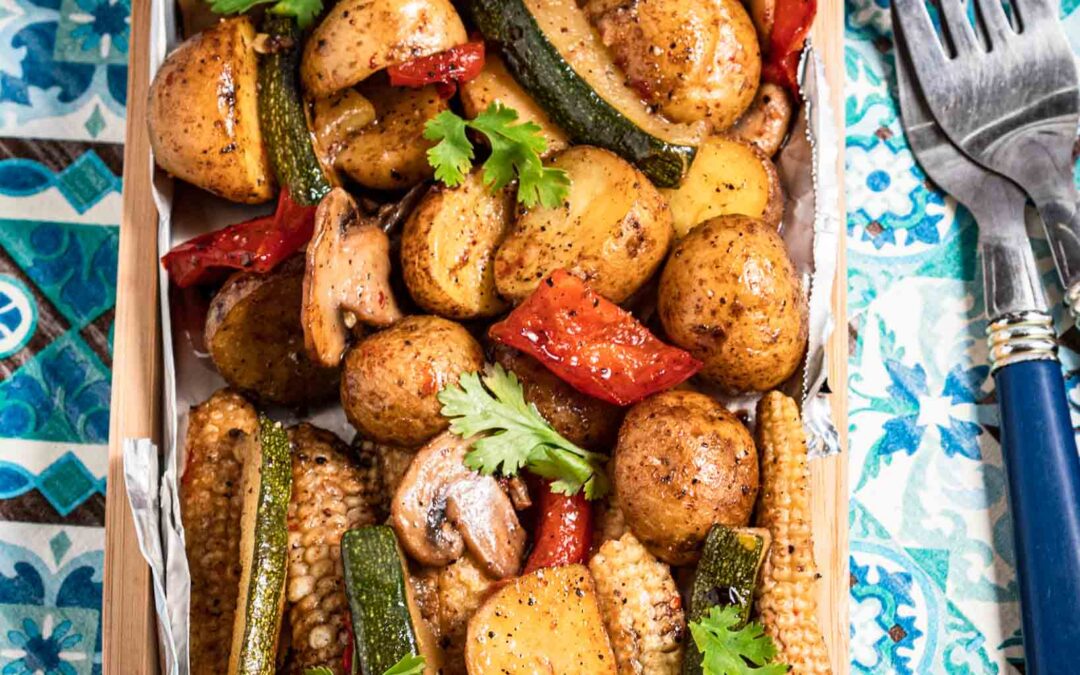
Oven Roasted Garlic Vegetables.
Healthy, guilt free, gluten free and vegan meals look like this. With minimal efforts, this turns out to be delicious. All you need to do is prep the veggies, put them in the oven. While it roasts, pour yourself a cup of chai, put your feet up and relax! Serve and relish it immediately to enjoy the crunch of the vegetables.
I use the seasonal and local vegetables available in my pantry/refrigerator whenever I make this. So this tastes great with squash, pumpkin, sweet corn niblets, varieties of mushrooms, capsicum, green beans, carrots and more. Just toss them in olive oil/sesame oil, add in the spices and herbs and of course minced garlic, and roast them to desired perfection. Pair this with soups of choice or a simple pasta on the side. My husband and I usually love to combine this with roasted tomatoes and garlic soup. This truly to be a delicious wholesome meal in itself too.
If you like this oven roasted garlic vegetables recipe, do let me know in the comments below. You can also connect with me on my Instagram and Facebook handles.
You may also like –
Harissa roasted veggies with tahini dressing
Roasted potatoes cauliflower & kale
Oven Roasted Garlic Vegetables
Arpita Darooka
Healthy, gluten free, vegan and delicious meal.
Prep Time 15 minutes mins
Cook Time 40 minutes mins
- 200 Gms Baby potatoes
- 1 Pc Red bell pepper
- 1 Pc Zucchini
- 200 Gms Baby corn
- 200 Gms Mushrooms
- 3 Tbsp Sesame oil
- 2 Tsp Garlic powder Or 3 tsp fresh garlic
- Salt and black pepper To taste
- 1 Tsp Sweet paprika
- 1 Tsp Dried mint leaves
Garnish
- Garlic infused olive oil
- Chopped cilantro
- Lime juice
Wash baby potatoes and boil them for 15 mins (do not pressure cook). Drain and lay them on a kitchen towel.
Meanwhile chop all other vegetables (preferably in equal sizes).
Toss the potatoes and veggies in sesame oil, garlic, salt, black pepper, paprika and mint.
Line a baking tray with foil or parchment paper, lay the vegetables in a single layer and bake them in a pre heated oven at 200 C for 40 mins or until done as preferred.
Remove from the oven, drizzle garlic infused olive oil, lime juice and cilantro and serve immediately.Enjoy!!!
Keyword oven roasted vegetables, garlic vegetables, oven roasted veggies
Mar 18, 2021 | Mains, Snacks
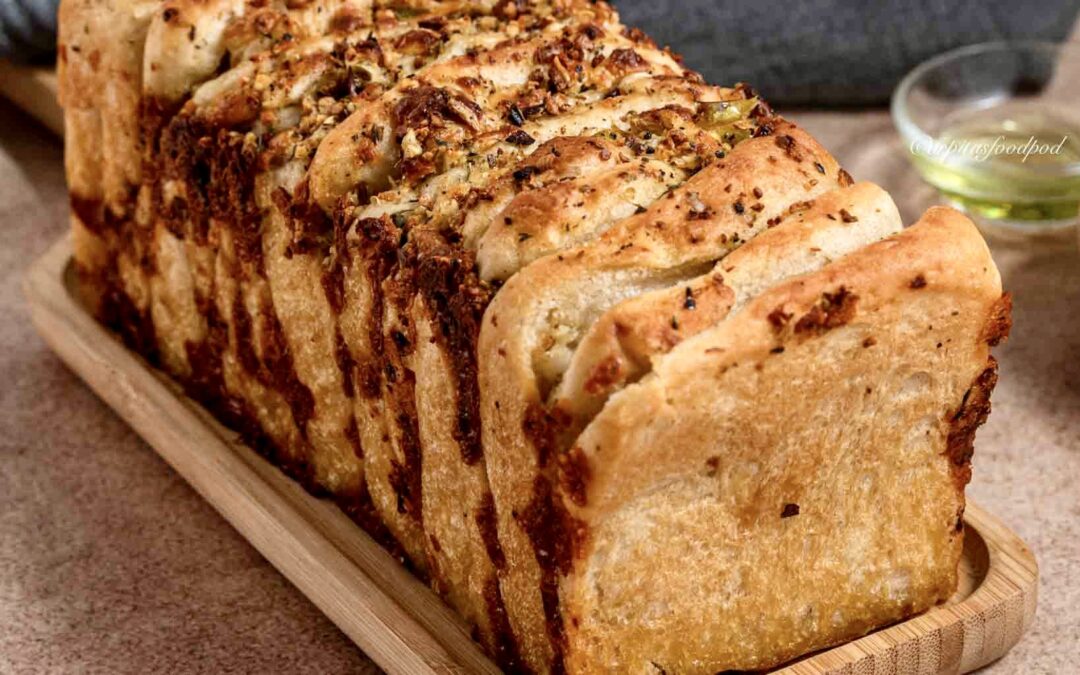
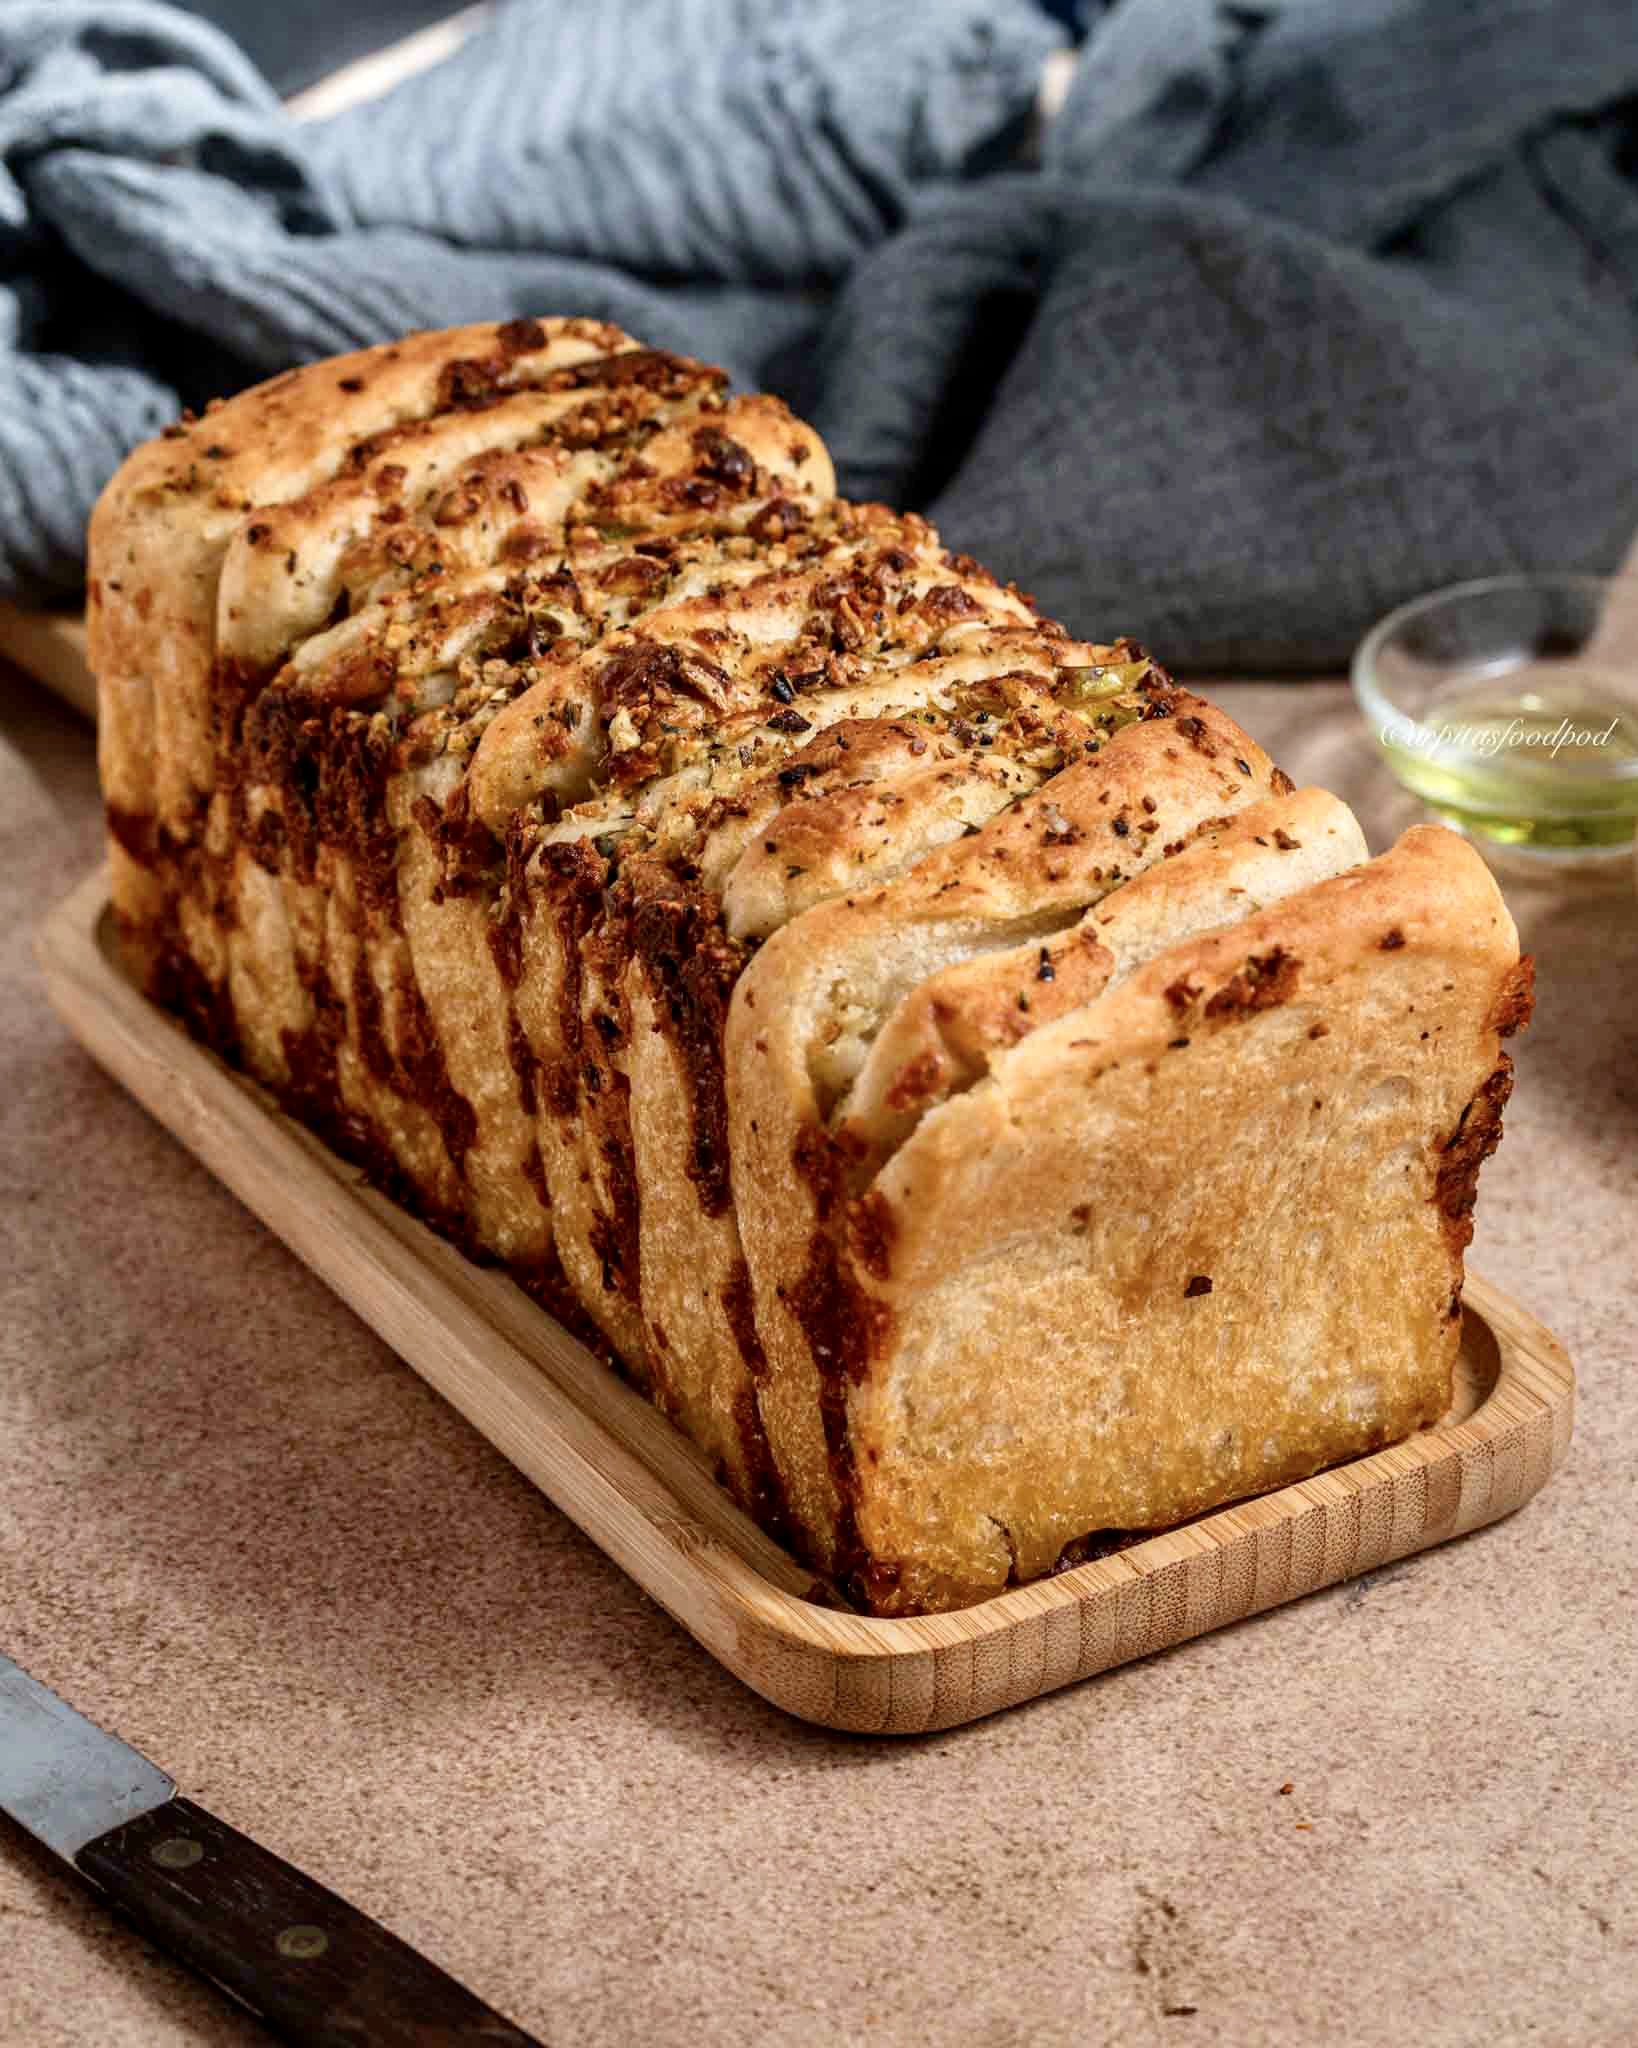
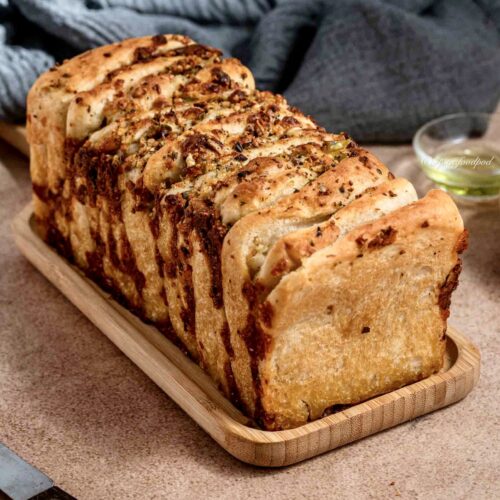
Cheese Chilli Garlic Pull Apart Bread
If you take your breads seriously, you got to try this recipe. So gorgeous to look at and so delicious, this is a delight for bread lovers. Every word in the title makes me drool. These are all my favourite flavours to work with and eat. Those tiger stripes are formed when the cheese bakes along with the bread. I am seriously obsessed with those. And do you see the crunchy garlic granules on top.
How to make it?
- Mix 1 tsp sugar and 1.5 tsp active dry yeast in 1/4 cup lukewarm water and leave it to get activated/ get frothy for around 10 mins.
- Mix 2 cups all purpose flour with , 1/2 cup lukewarm water, 2 tbsp olive oil and the activated yeast and make a soft dough.
Knead it for atleast 12 mins or until it becomes smooth and tuck the dough.
- Cover with cling film and leave it to rest for 1 hour.
- Meanwhile for the filling, in a bowl mix – 1 cup shredded mozzarella and cheddar, salt and black pepper, 2 tsp dried herbs, 4-5 minced green chillies, 1/2 tsp red chilli flakes, and 1/4 cup minced garlic. Keep it in the fridge.
- After an hour the dough doubles in size.
- Punch it gently to release air and now using a rolling pin, flatten the dough into a rectangle shape with a thickness of 4mm.
- First layer the whole bread 4 tbsp melted butter.
- Then layer it with the cheese chilli and garlic mix. Now cut them into 4 equal strips.
- Place the strips on top of each other, and again using a pizza cutter cut them into 4 equal squares. Place them in a loaf pan and cover it with a moist soft cloth for 30 mins.
- Brush a little melted butter on top and add a few garlic flakes. Sprinkle some herbs and chilli flakes too.
- Bake it in a pre heated oven for 25 mins or until it turns golden brown at 180 degrees C without fan and 175 degrees C with fan ( the first 10 mins of baking was with a lid).-In a bowl, mix melted butter, dry herbs of choice, chilli flakes, fresh parsley and brush it on top (optional).
Enjoy!
If you like the Cheese Chilli Garlic Pull Apart Bread recipe, I would love your thoughts in the comments section below.
You can also connect with me on my Instagram and Facebook handle.
You may also like –
Whole wheat and Buckwheat Pizza
Cheese Chilli Garlic Pull Apart Bread
Arpita Darooka
Spicy, garlic pull apart bread. Perfect snack for tea time.
Prep Time 12 minutes mins
Cook Time 25 minutes mins
Proofing Time 1 hour hr 30 minutes mins
Course Main Course, Snack
Cuisine Global
- 2 Cups All purpose flour
- 1.5 Tsp Active dry yeast
- 1 Tsp Sugar
- 3/4 Cup Lukewarm water
- 2 Tbsp Olive oil
- 1 Cup Mozzarella & Cheddar cheese
- 2 Tsp Dried herbs
- 4-5 Pcs Green chillies Minced
- 1/2 Tsp Red chilli flakes
- 1/4 Cup Garlic Minced
- 4 Tbsp Butter Melted
- Garlic flakes As required, optional
- Fresh parsley As required
Mix sugar, yeast and 1/4 cup lukewarm water and leave it to get activated/frothy for around 10 mins.
In a wide bowl, add all purpose flour, 1/2 cup lukewarm water, oil and activated yeast and make a soft dough.
Knead it for at least 12 mins or until it becomes smooth and elastic. Tuck the dough, cover with a cling film and leave it to rest for 1 hour.
Meanwhile for the filling, in a bowl mix - cheese, salt and pepper, dried herbs, minced green chillies, red chilli flakes and minced garlic. Keep it in the refrigerator.
After an hour the dough doubles in size. Punch it gently to release air and now using a rolling pin, flatten the dough into a rectangle shape with a thickness of 4mm.
First layer the whole bread 4 tbsp melted butter.
Then layer it with the cheese chilli and garlic mix. Now cut them into 4 equal strips.
Place the strips on top of each other, and again using a pizza cutter cut them into 4 equal squares. Place them in a loaf pan and cover it with a moist soft cloth for 30 mins.
Brush a little melted butter on top and add few garlic flakes. Sprinkle some herbs and chilli flakes too.
Bake it in a pre heated oven for 25 mins or until it turns golden brown at 180 C without fan and 170 C with fan (the first 10 mins of baking was with a lid).
In a bowl, mix meltebutter, dried herbs, chilli flakes, fresh parsley and brush it on top (optional).Enjoy!!!
Keyword cheese chilli garlic pull apart bread, bread recipes, bread photography
Mar 10, 2021 | Drinks
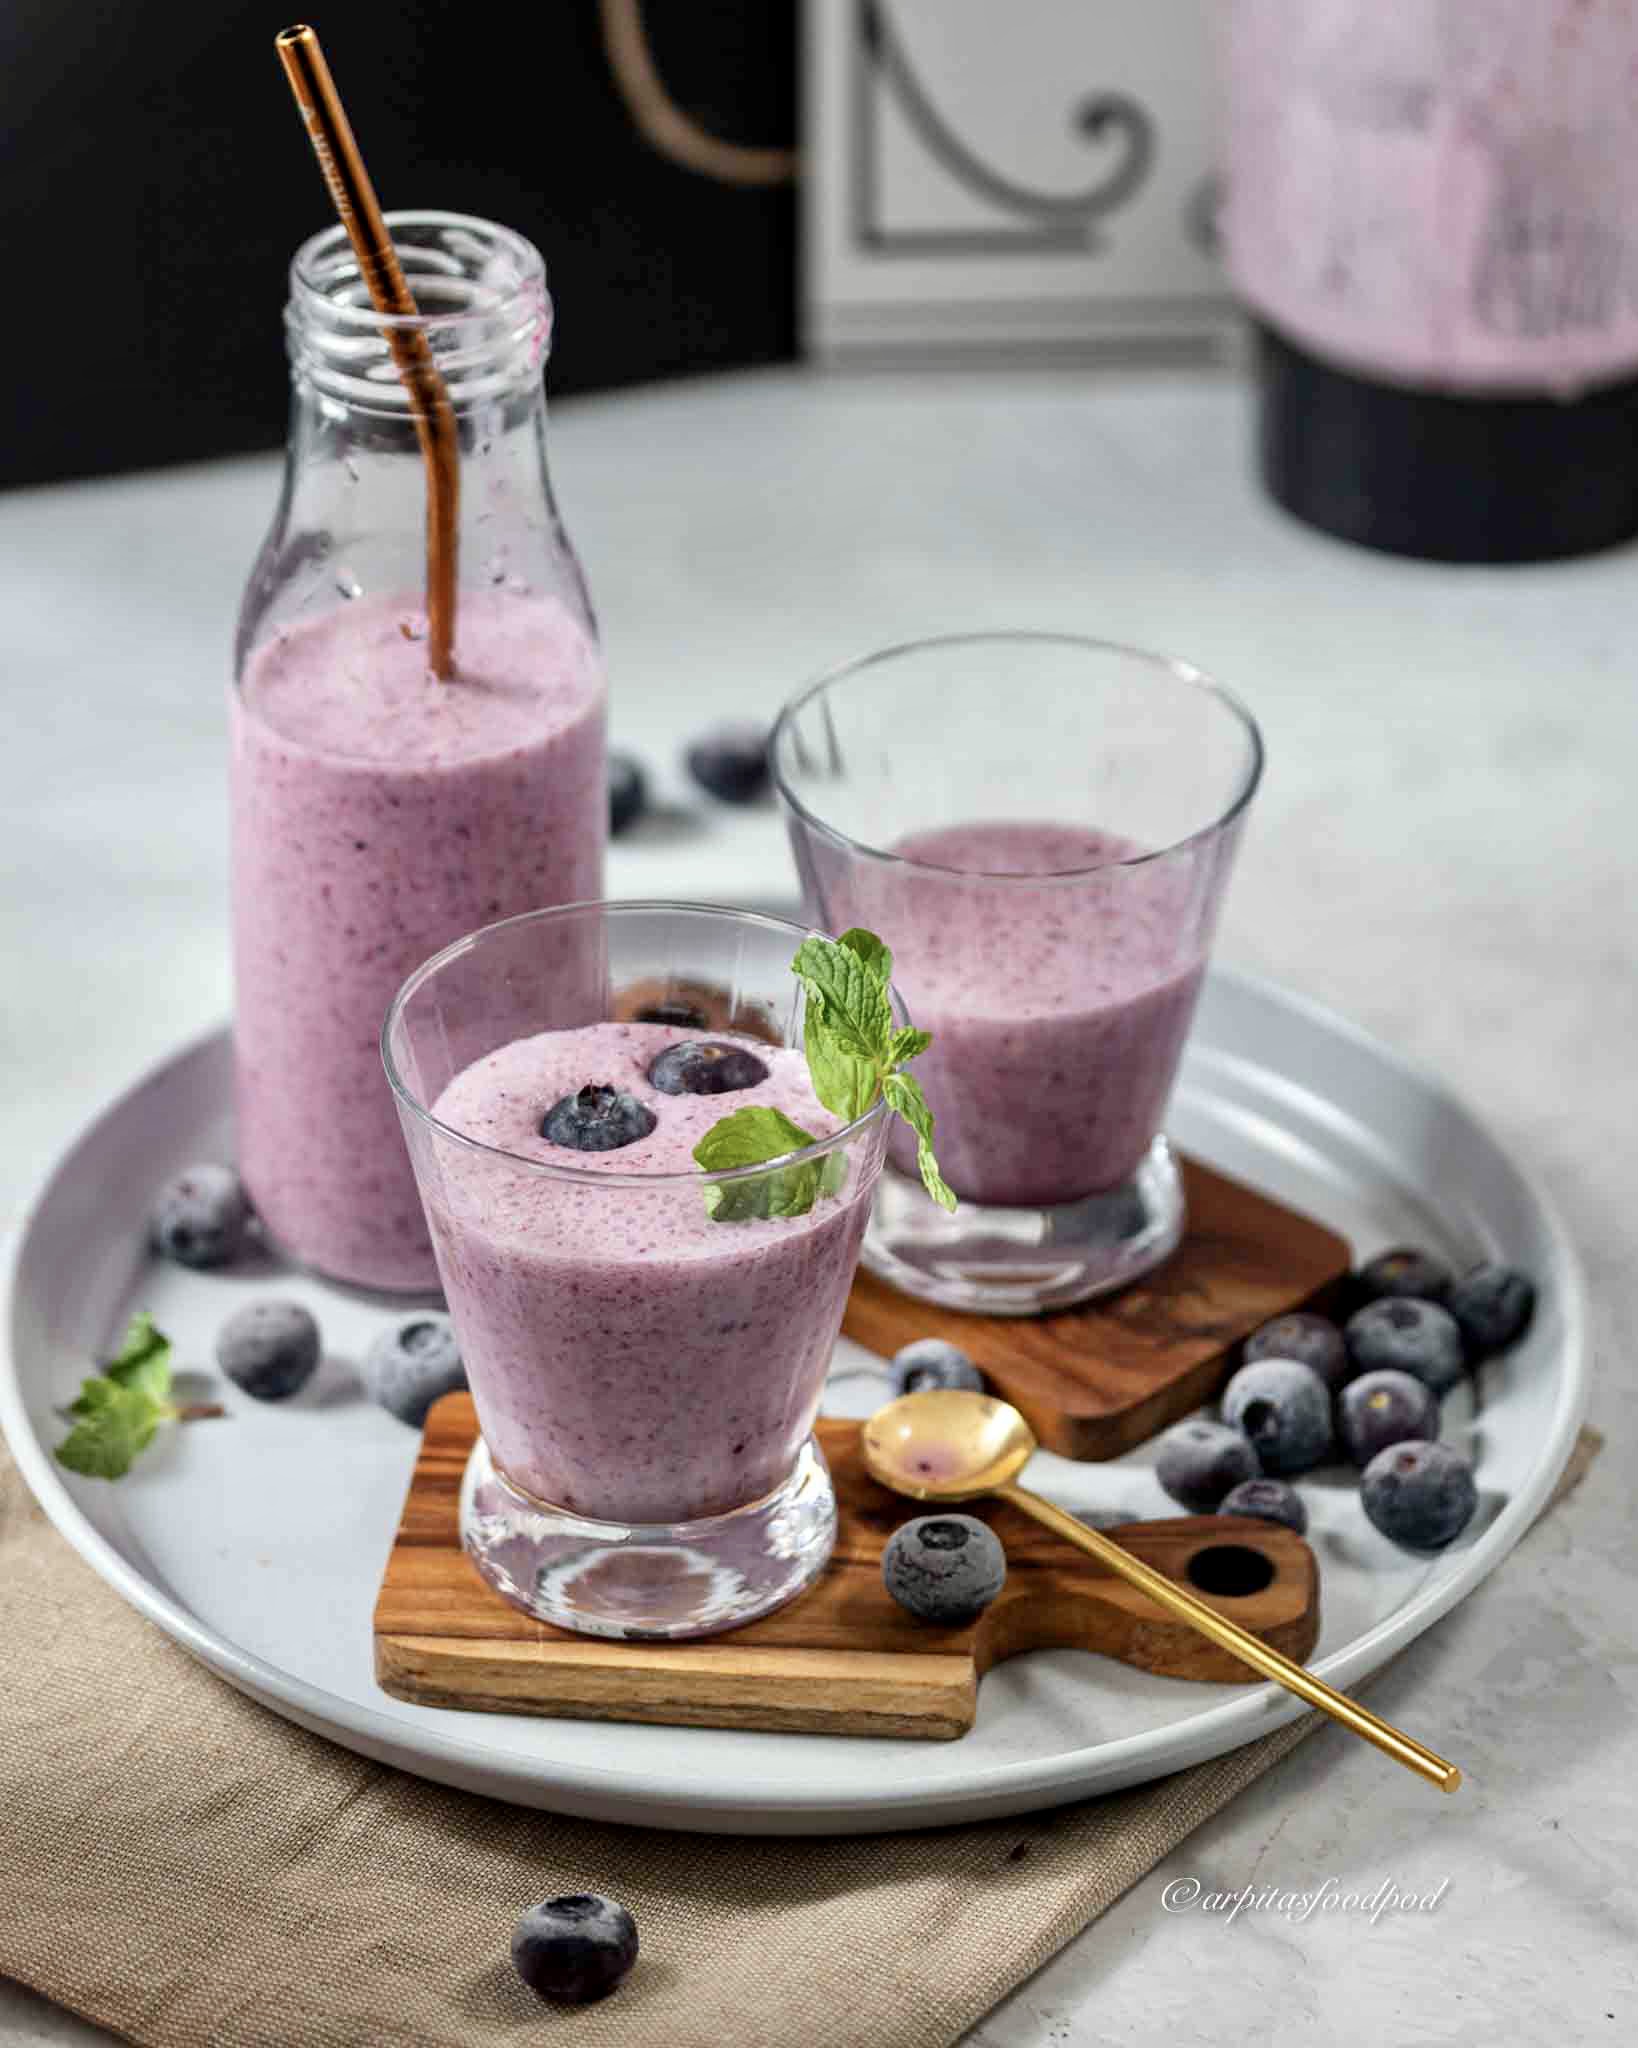
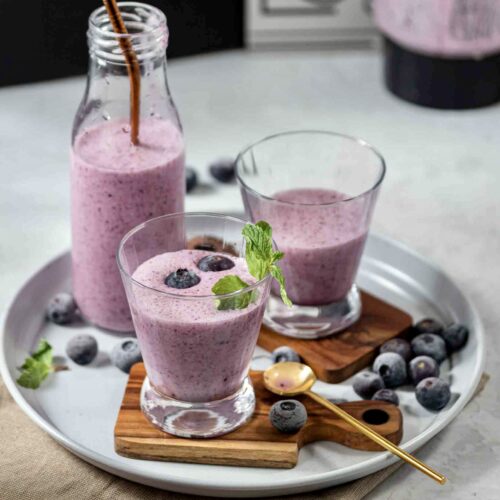
Blueberry Banana Lassi
Spring and summer season calls for quick and hearty cool drinks. Combining fruits/berries with yogurt in any form is our favourite way of consuming either of them. Whether frozen or as a drink, it’s sure to please kids and adults both. Indian summers brings tons of seasonal fruits with it and this is one simplest way of incorporating it in our meals.
Thick, creamy and super delicious, this is so good for healthy morning breakfast meal or tasty mid day snack. I don’t mind this as my dessert too. Traditionally lassi is made with loads of sugar to sweeten it, but as we take a step more towards healthier lifestyle, I choose agave, honey or maple syrup to sweeten it. Feel free to use any sweetener as per choice or dietary restrictions. Since the fruits have their natural sweetness and tart that they impart to the drink, I don’t mind not adding any sweetener too. However, in that case add around half a banana more. The combination of banana and blueberries balances the flavours perfectly.
If you like this blueberry banana lassi recipe, do let me know in the comments below or connect with me on my Instagram or Facebook handles.
You may also like to try –
Guava Mint Chilli Smoothie
Blueberry Banana Lassi
Arpita Darooka
Delicious and healthy.
Prep Time 10 minutes mins
Course Drinks
Cuisine Global
- 1.5 Cup Yogurt
- 3 Tbsp Milk
- 1/2 Cup Blueberries and banana (sliced)
- 1 Tsp Chia seeds
- 1 Tsp Sweetener of choice optional
Keyword Blueberry recipes, blueberry banana lassi
Mar 10, 2021 | Condiments and spices
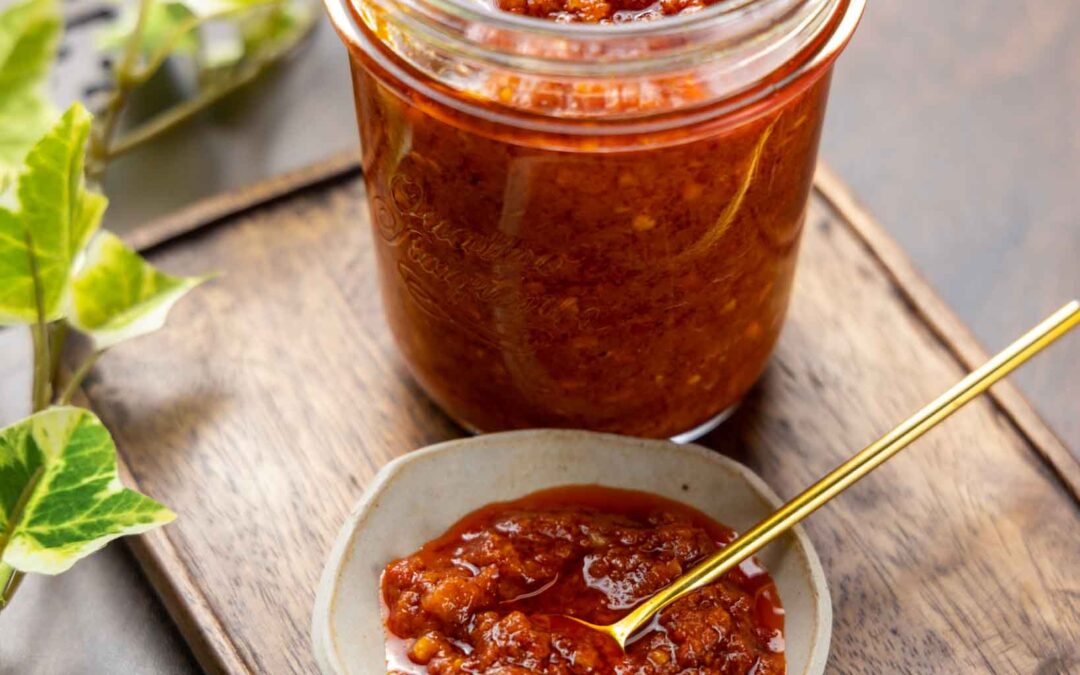
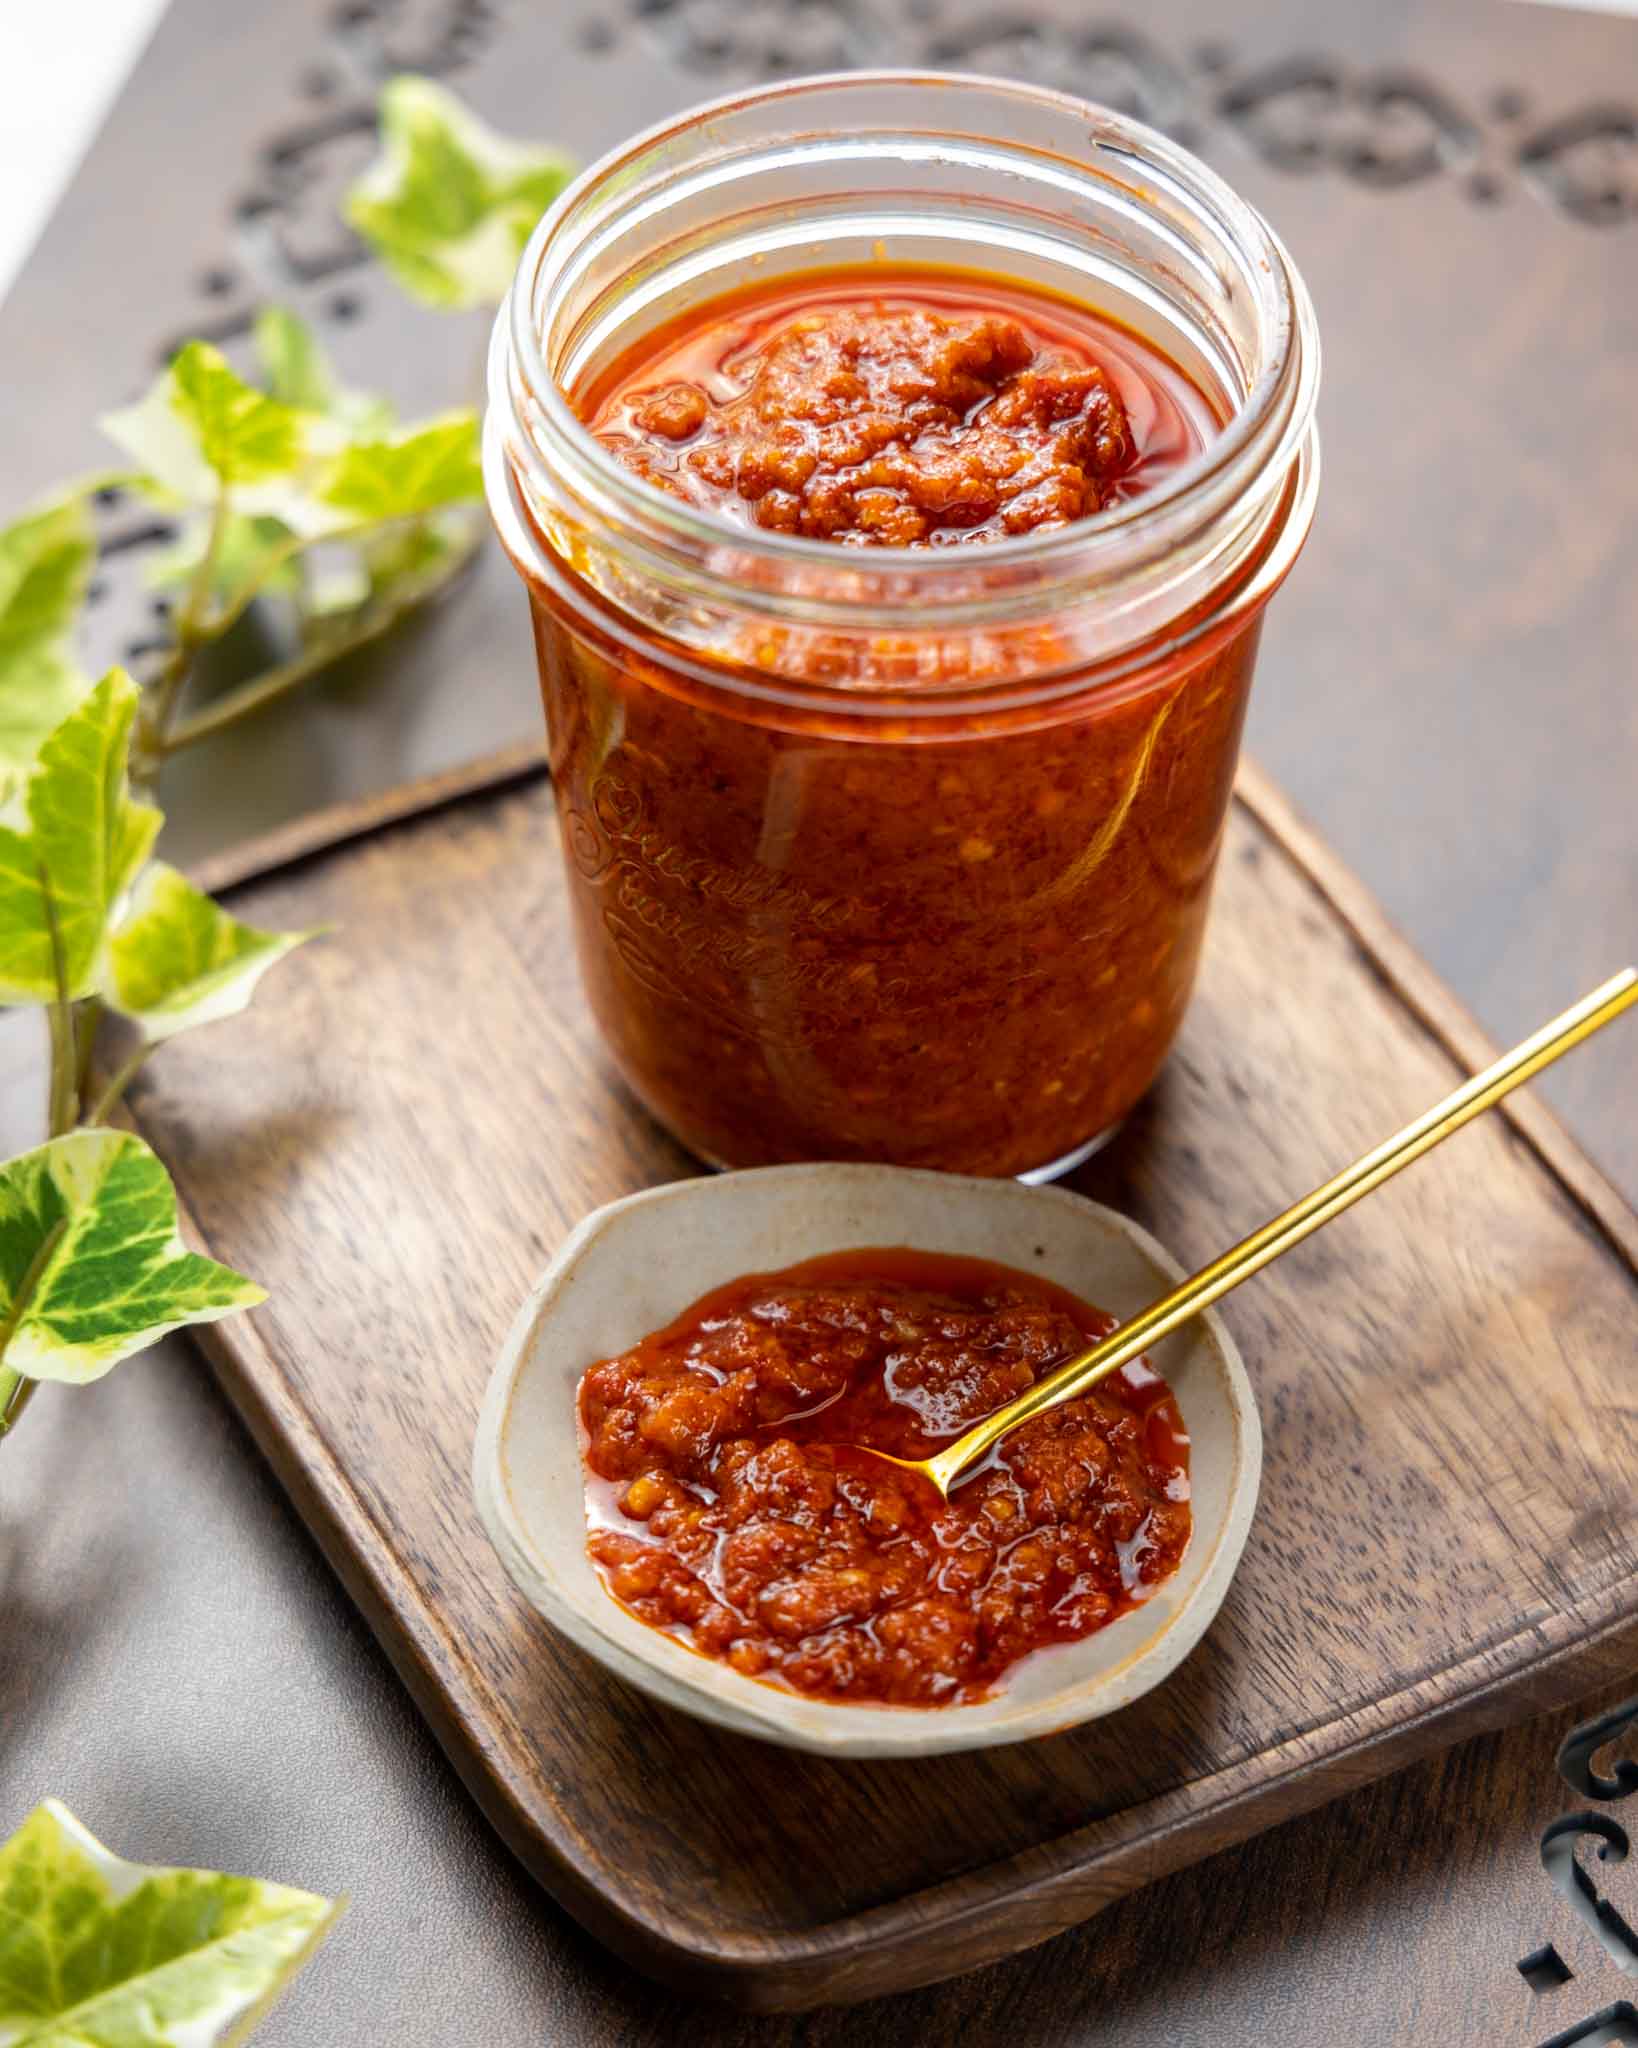
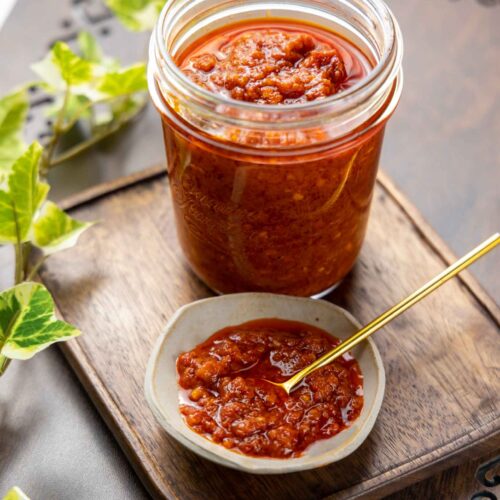
Marwari Hot Garlic Chutney
This is one hot and spicy Indian condiment which makes Indian food more interesting. During our trips to Rajasthan, we have had various versions of this chutney, both in dry and paste form. This is a staple condiment there and served with almost every meal. Hot phulkas smeared with this chutney, makes a delicious quick snack in itself.
How is it made?
It is made with garlic, dry red chillies, ginger, oil, salt, jaggery and lemon juice. Pairs perfectly well with simple chapatis or parathas (Indian flatbreads), dal rice, khichdi, and almost every Indian food. To make this, soak dry red chillies for half an hour in hot water. Grind them along with the garlic and that soaked water. Heat oil and add the garlic chilli paste. Cook it on medium flame until the sides release oil and then cover and cook it for some more time on low flame until the oil floats on top. Then add salt and sugar. Remove from heat, let it cool and then add lemon juice. Enjoy!
The heat/use of chillies could be reduced as per preference. The use of oil is a bit more, so it cooks well and preserves well for a few months.
How to store it?
This Marwari hot garlic chutney could be stored in an airtight jar for upto 3 months in refrigerator.
If you like this recipe, let me know your thoughts in the comments below. You can also connect with me on my Instagram and Facebook handle.
You may also like –
Dried Plums Chutney
Marwari Hot Garlic Chutney
Arpita Darooka
Spicy and hot condiment for Indian food
Prep Time 10 minutes mins
Cook Time 15 minutes mins
Course Condiments
Cuisine Indian
- 1/2 Cup Garlic cloves
- 15-16 Pcs Dry red chillies Soaked in hot water for 30 mins.
- 1 Inch Ginger
- 1/2 Cup Oil
- 1.5 Tsps Salt
- 1.5 Tsps Sugar/jaggery
- 1 Tsps Lemon juice
Grind soaked chillies, ginger and garlic with minimal water from the soaked chillies. Grind into a paste.
Heat oil in a pan and add the garlic and chilli paste. Stir and cook for 7-8 mins until the sides starts to release oil on medium low flame.
Lower the heat and let it cook until the oil floats on top. Add salt and sugar. Mix it well. Cook for another minute.
Remove from heat, let it cool down. Add lemon juice. Enjoy!!!
Keyword Indian garlic chutney recipe