Jun 17, 2021 | Desserts
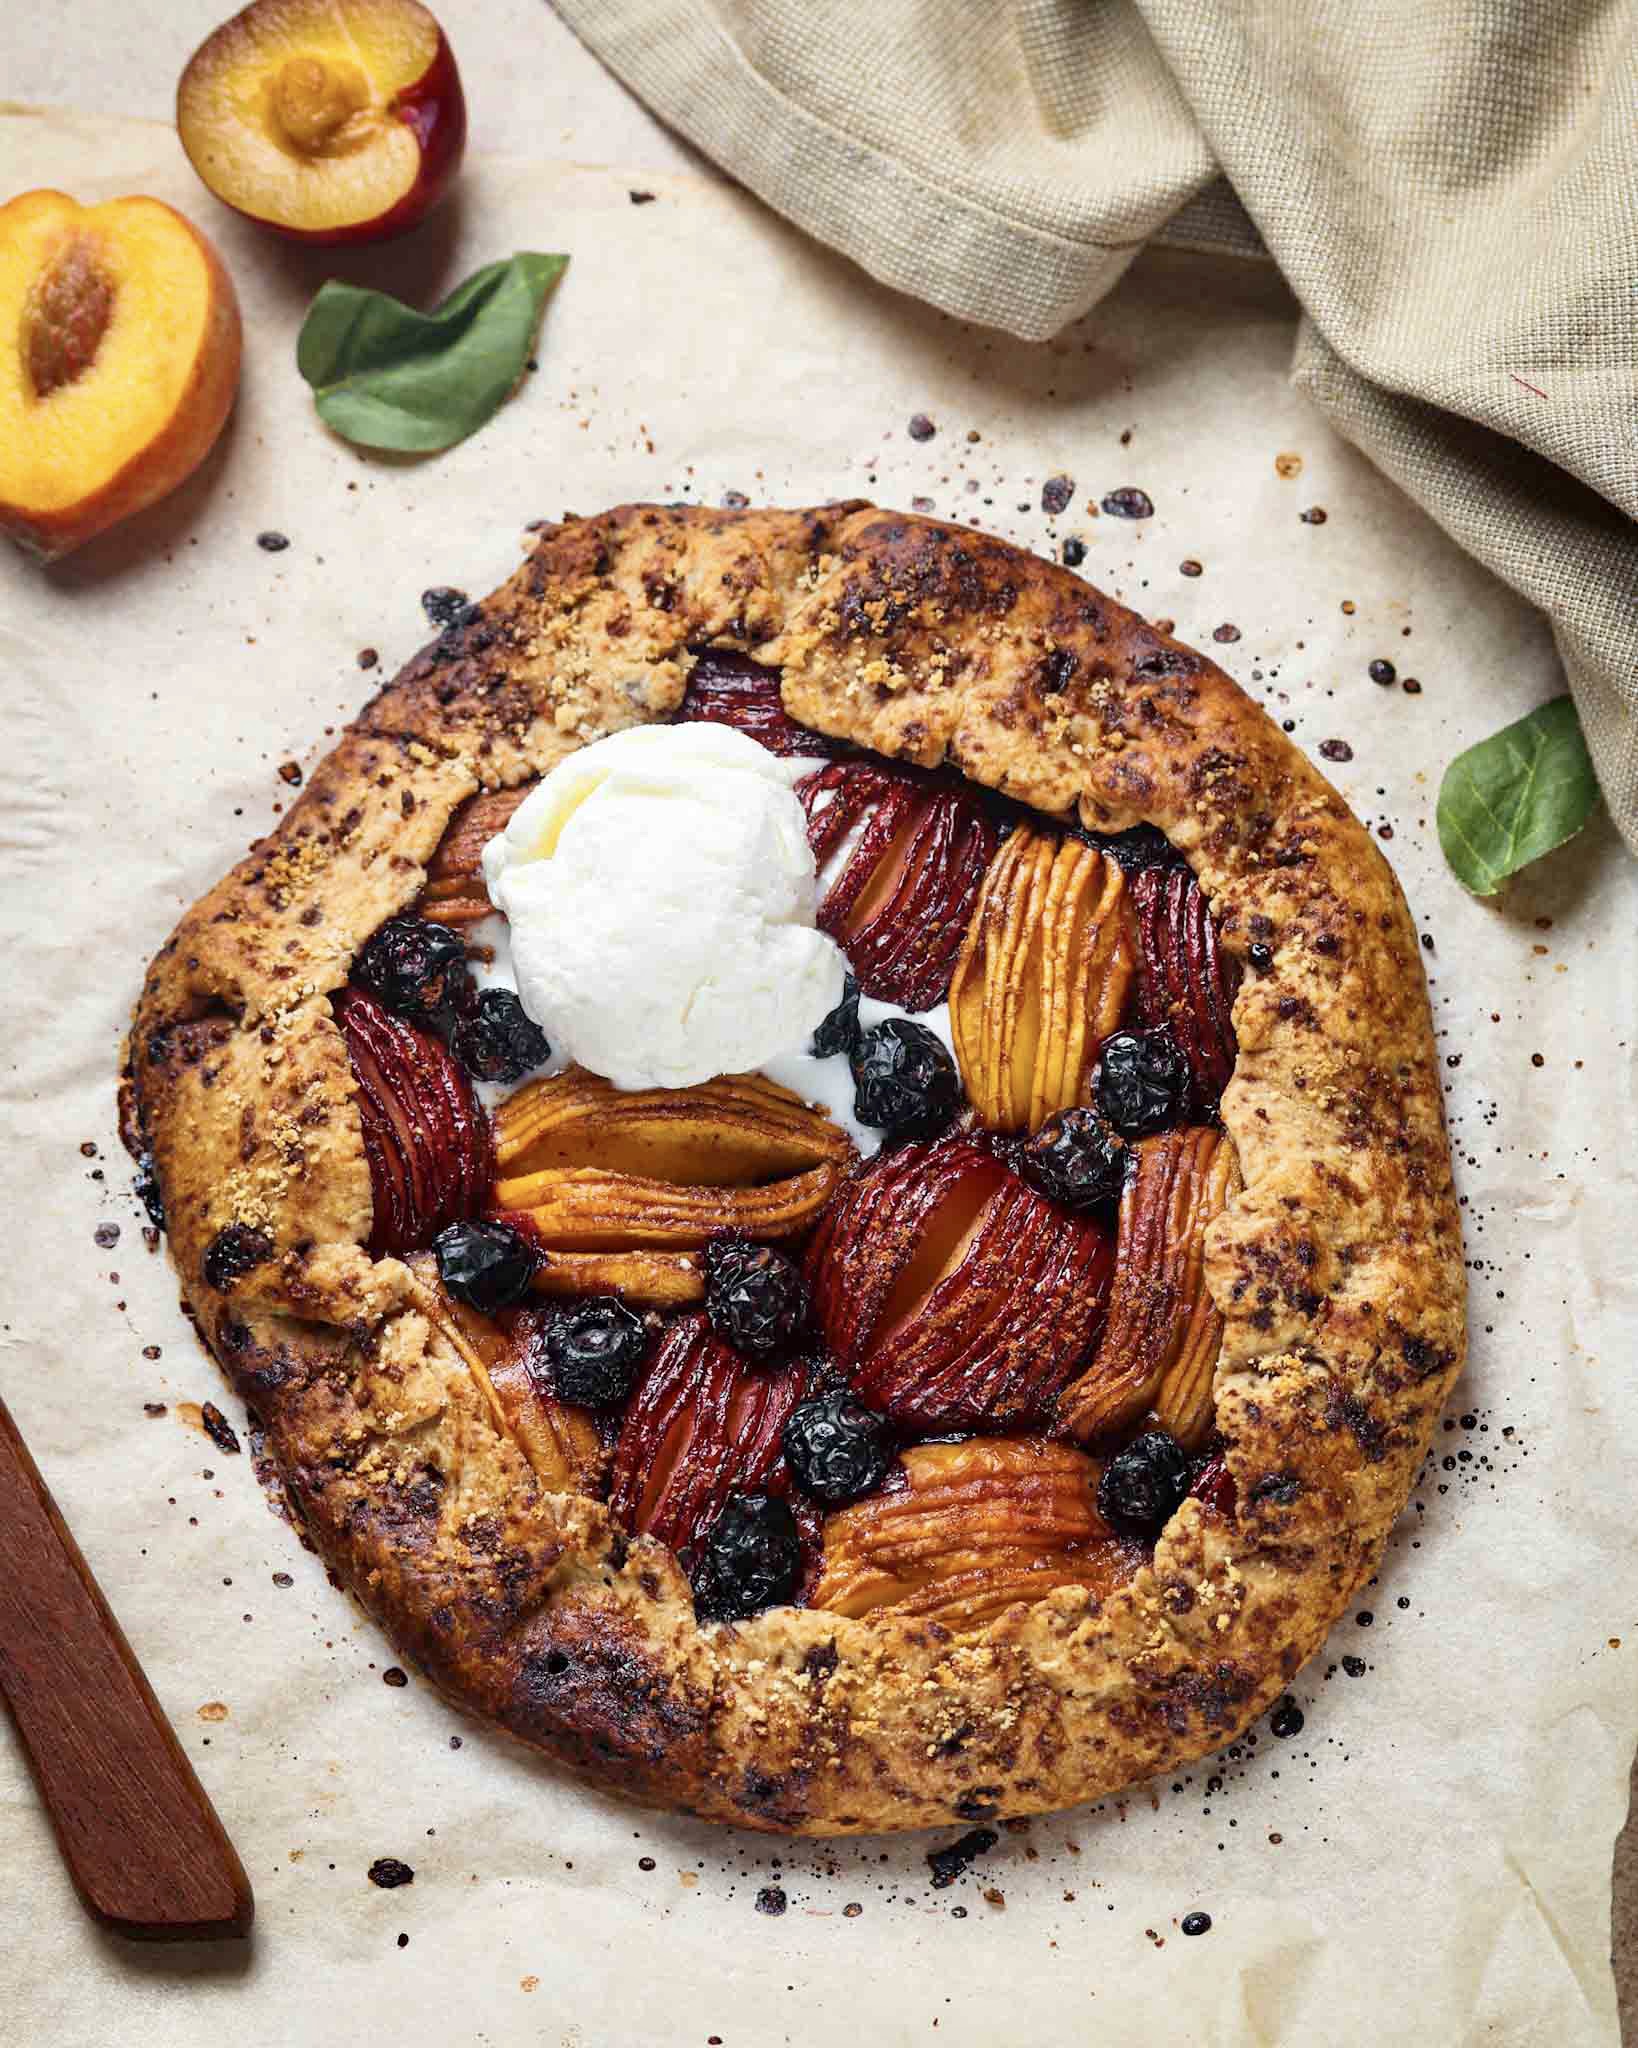
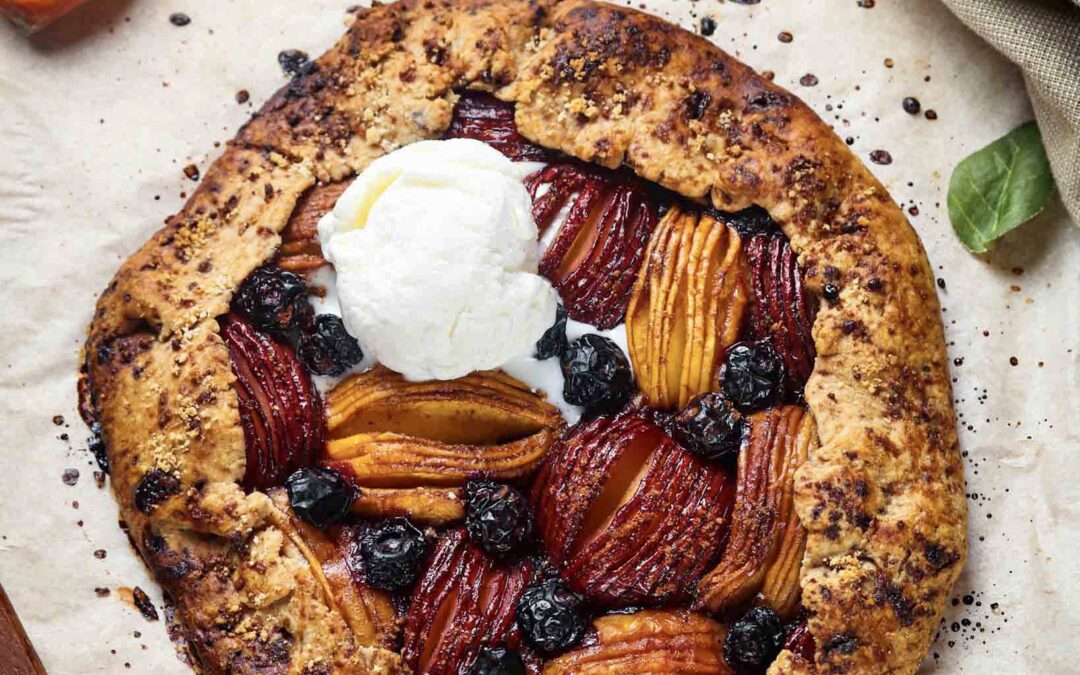
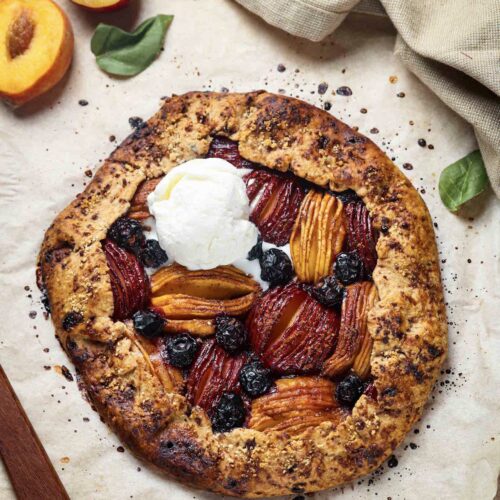
Peach Plum & Blueberry Galette.
This is a dessert of my dreams. A French dessert which is rustic, with flaky and crisp crust, tangy and sweet.
Would you believe if I tell you this is refined sugar free too? I used coconut sugar to make this dessert. I also used a combination of whole wheat flour and all purpose flour along with pulsed almonds and it tastes superb!!! This is such a simple and easy recipe that results in a gorgeous looking dessert. The only thing is to work pretty quickly with the dough so that the butter doesn’t melt. That is what makes it flaky and crisp. Also, avoid keeping the dough in the room temperature for too long. Sliding it in the refrigerator at every opportunity is recommended.
Since plums and peaches are in season in India, I have used those fruits primarily. Feel free to use strawberries or any other berries and stone fruits of choice.
If you like this peach plum and blueberry galette recipe or have questions, please let me know your thoughts in the comments below or connect with me on my Instagram and Facebook handle.
You may also like –
Whole wheat chocolate and banana cake
Oats and chocolate cookies
Peach Plum & Blueberry Galette
Arpita Darooka
Refined sugar free, guilt free, delicious fruit dessert.
Prep Time 15 minutes mins
Cook Time 40 minutes mins
Course Dip
Cuisine French, Global
- 1/3 Cup Whole wheat flour
- 1/3 Cup All purpose flour
- 4.5 Tbsp Coconut sugar or brown sugar
- 5 Pcs Butter cubes cut into 1 inch each Butter should be cold and not at room temperature.
- 1/4 Tsp Salt (if using unsalted butter) Optional
- 3 Tsp Ice cold water
- 4 Pcs Plum - small to medium sized
- 4 Pcs Peaches - small to medium sized
- 1/8 Cup Blueberries
- 1/4 Cup Almond powder
- 1/2 Tsp Cinnamon powder
- 2 Tbsp Milk Or whisked eggs
- Vanilla Ice cream To serve
In a mixing bowl - add whole wheat flour, all purpose flour, 1 tbsp coconut sugar and butter. Mix them well until the mix is crumbly.
Sprinkle cold water and knead until moistened yet crumbly. Knead it quick into a dough. Don’t worry about the smoothness.
On a lightly floured surface and by using a rolling pin roll the dough into a circle. Transfer it to a cut out parchment paper and put it in the fridge for 10 mins.
Meanwhile cut the fruits into thin wedges.
Take the dough out of the fridge, and still keeping it on the parchment paper, roll it into a thinner and bigger circle. Thickness around 1/8 inch. Don’t worry about the rough edges.
Put the parchment sheet on to a baking tray. Now by leaving 1 inch space on the sides, sprinkle evenly a little flour on top. Then sprinkle the almond powder evenly. Sprinkle 2 tbsp coconut sugar. Arrange the cut fruits and blueberries. Sprinkle 1 tbsp coconut sugar and cinnamon powder on the fruits.
Fold in the edges on the fruits and brush the top of the dough with milk or beaten egg. Sprinkle a little almond powder and coconut sugar on top.
Transfer it again to the fridge. Meanwhile pre heat oven to 175 C (fan assisted)
Bake this gorgeous beauty for 40 - 45 mins or until the crush is golden brown and the fruits look tender enough.
Serve with vanilla ice cream.Enjoy!!!
Working fast with the dough is highly recommended so that the butter doesn’t melt. This is essential for a flaky crust.
Strongly recommend serving this with vanilla ice cream. Keyword french dessert, Peach plum and blueberry galette, rustic dessert recipe
Jun 15, 2021 | Mains
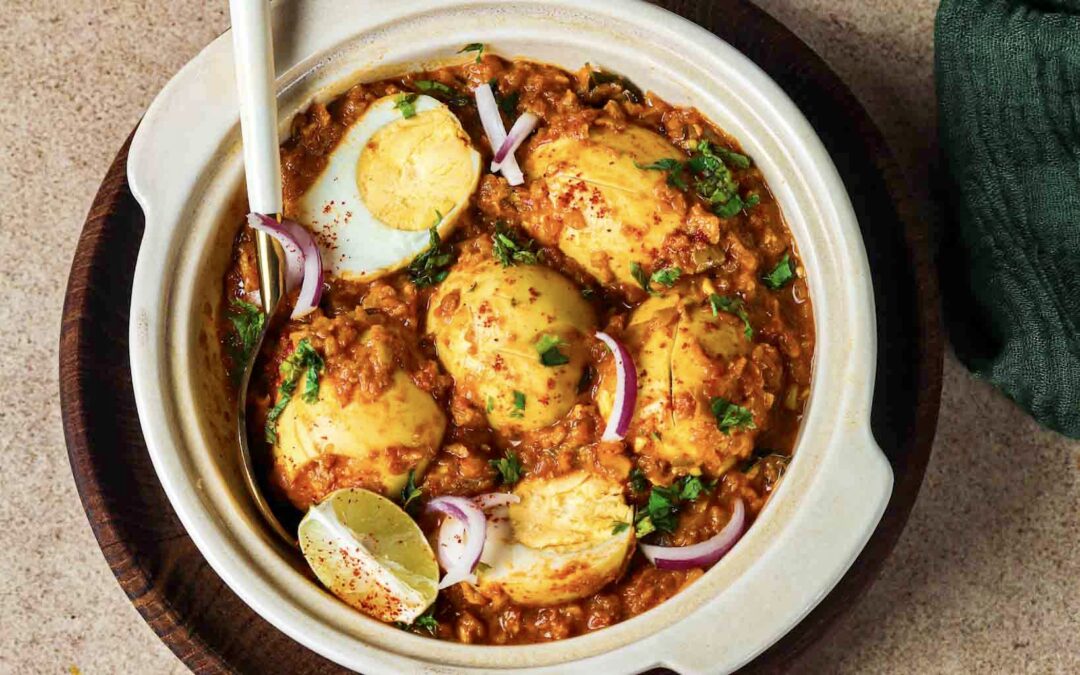
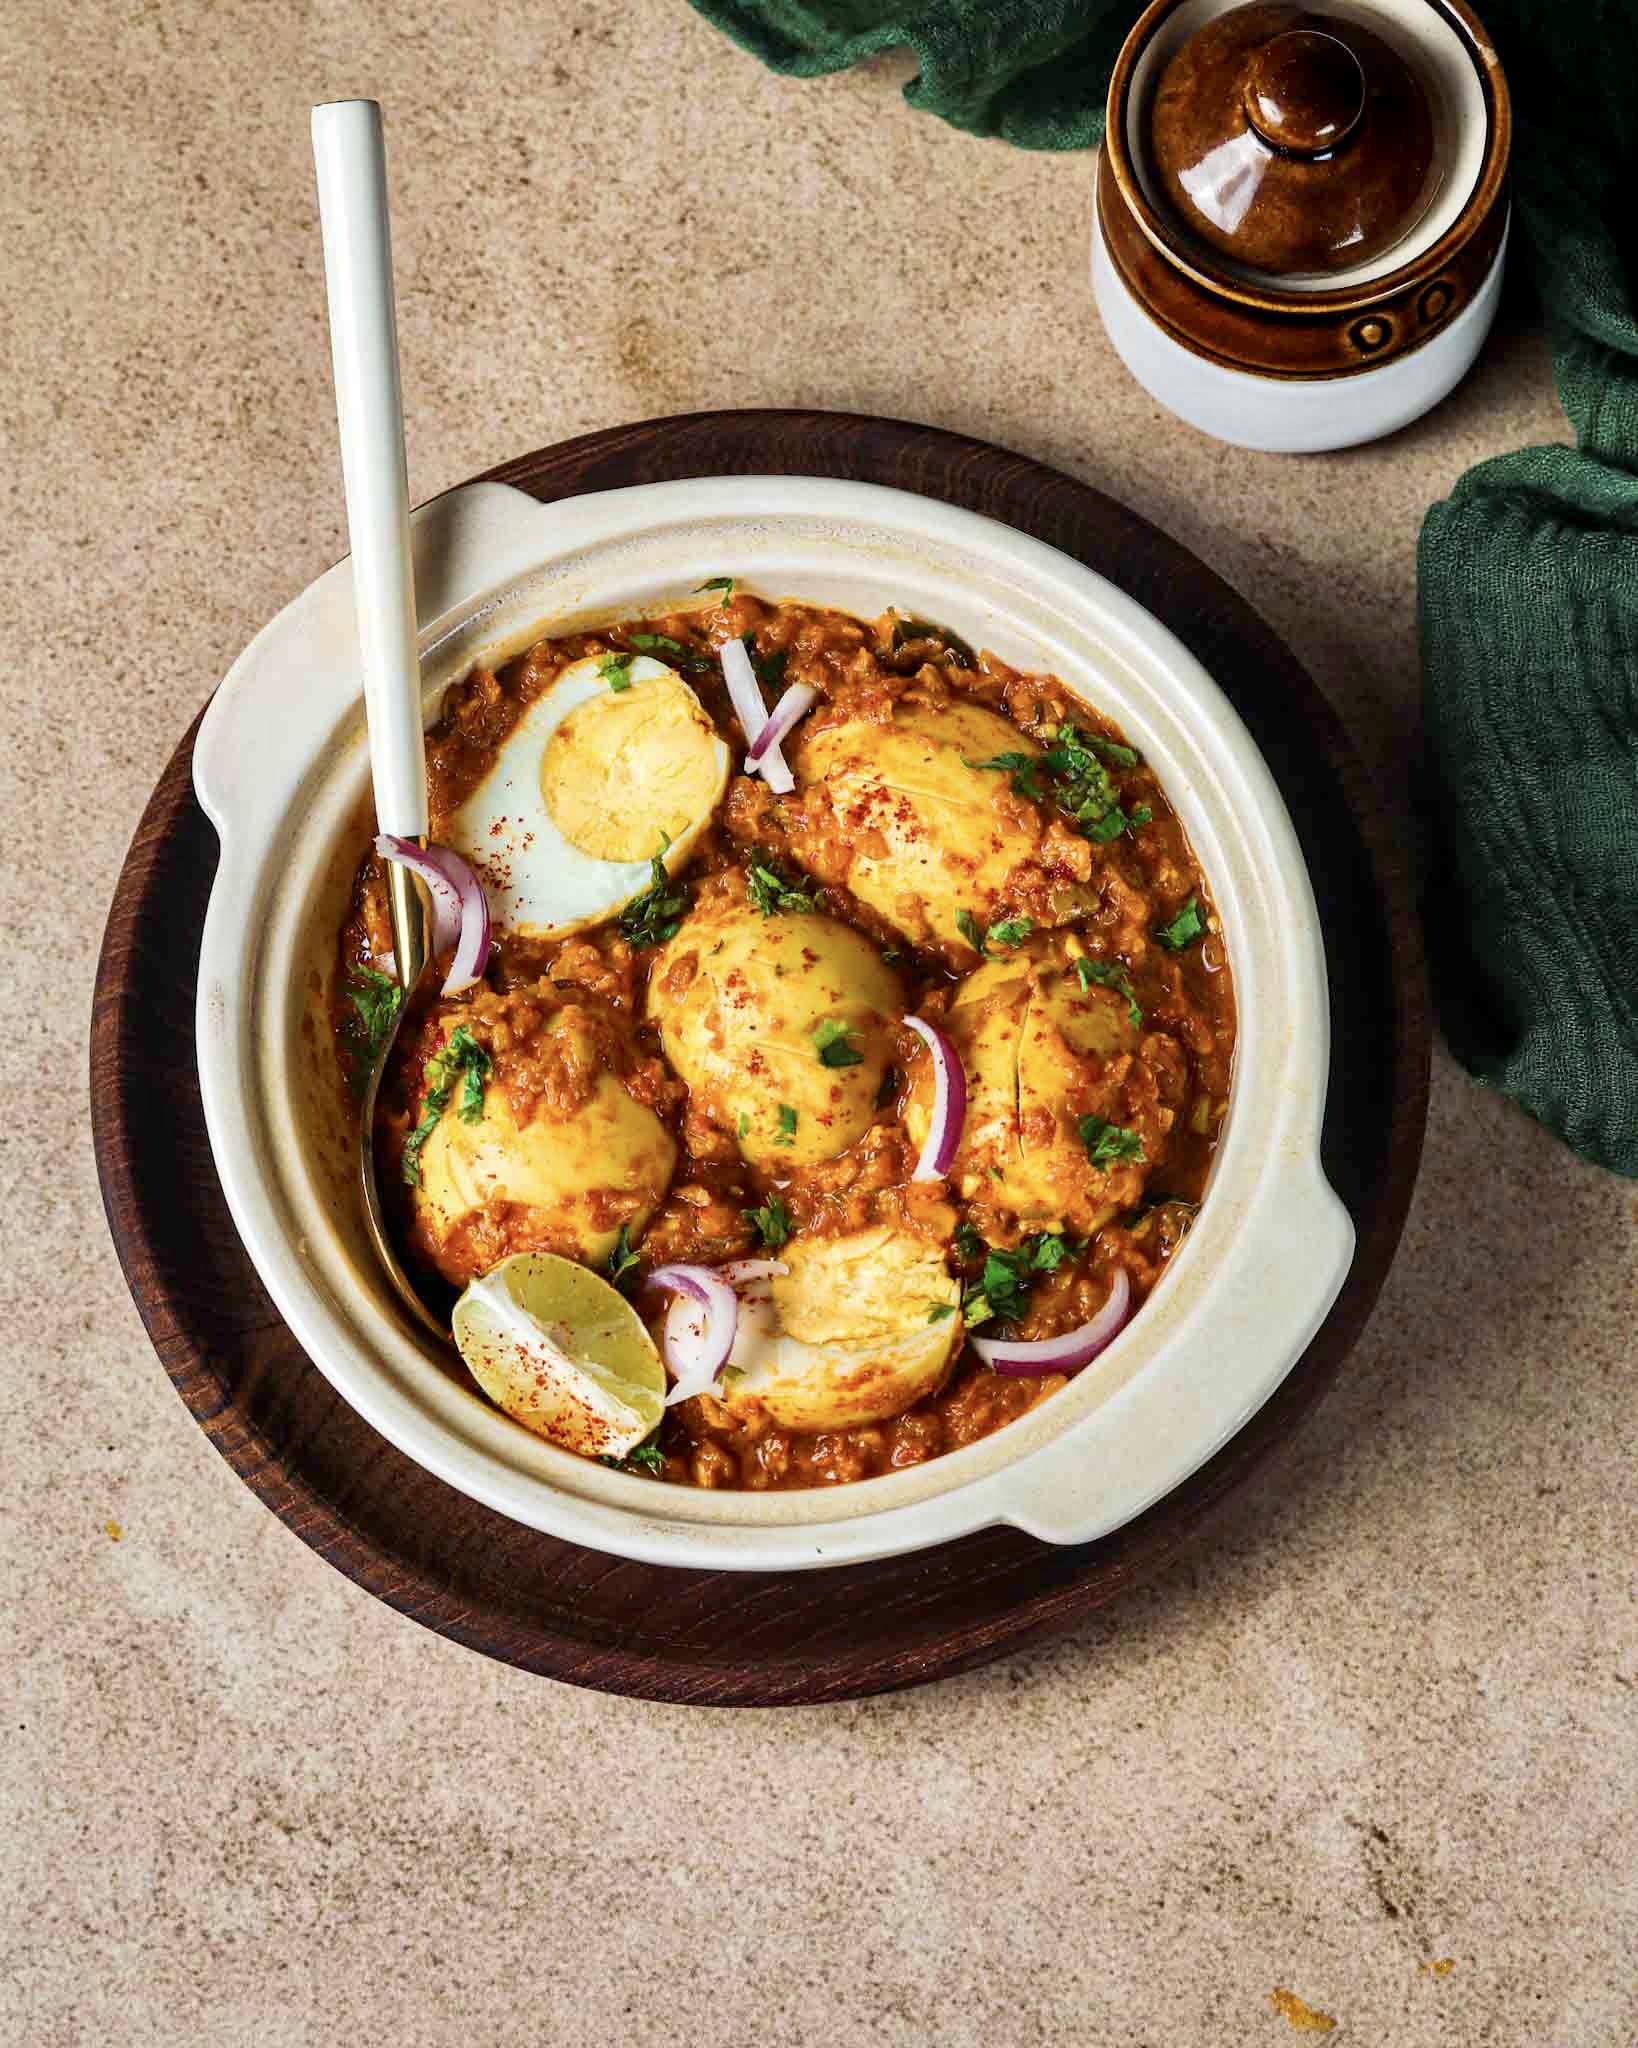
Indian Dhaba Egg Curry.
A curry so flavourful, spicy, delicious and pairs so well with any flatbreads or rice preparations of choice. This Egg curry reminds me of the egg curries you get in Indian road side dhabas. Rich, spicy and more-ish. These road side dhabas do not have too much many things to offer in their menu, but whatever they serve is so village style and full of delicious flavours. Egg curry is one such thing.
We love to pair this with simple and humble chapatis with a side of onion salad and a lemon wedge. Oh! Me and my family are the happiest with this kind of a meal.
This is an onion, tomato and coconut gravy with a variety of Indian spices which will leave you wanting for more. In this recipe, I have used coconut milk but feel free to skip that and add whisked curd to the gravy. I believe coconut milk balances the spices and gives it a wonderful flavour.
If you like this Indian dhaba egg curry recipe or have any questions, please leave your thoughts in the comments below or connect with me on my Instagram or Facebook handle.
You may also like –
Indian Kadhai Paneer
Indian Matar Paneer Gravy
Indian Egg Curry
Arpita Darooka
Spicy, flavourful, delicious meal option.
Prep Time 15 minutes mins
Cook Time 25 minutes mins
Course Main Course
Cuisine Indian
- 8 Pcs Eggs Hard boiled
- 2 Pcs Onions - medium sized Finely chopped
- 5 Pcs Tomatoes - small to medium sized Puréed
- 5-6 Pcs Green chillies
- 9-10 Cloves Garlic
- 1.5 Inch Ginger
- 1/4 Cup Coconut milk
- 1 Tsp Cumin seeds
- 3 Pcs Green cardamom
- 7-8 Pcs Whole black pepper
- 1 Pc Star anise
- 1/2 Tsp Turmeric powder
- 1 Tsp Red chilli powder
- 1.5 Tsp Coriander powder
- 1 Tsp Roasted cumin powder
- 1/2 Tsp Garam masala
- 1/4 Tsp Kasuri methi optional but recommended
- Salt to taste
- 1/4 Cup Coriander leaves Chopped
- 7-8 Pcs Curry leaves
- 2 Tbsp Ghee
- 1 Tbsp Oil
- 1 Cup Water
Hard boil eggs and keep aside. (Boil for 10 mins and then immediately put them in ice cold water. Easy to peel)
Make a coarse paste of green chillies, garlic and ginger.
Heat oil and ghee in a pan (oil is added in ghee while cooking so that the ghee doesn’t burn). Add cumin seeds, cardamom, whole black pepper and star anise. Sauté them until fragrant.
Add in the curry leaves and green chilli paste. Sauté for 20 secs and add the onions. Let the onions cook until they turn light brown. Give it a couple of stirs.
Add in the tomato purée and let it cook for medium low flame until the sides start releasing oil.
Add in salt, turmeric powder, red chilli powder, roasted cumin powder, and coriander powder. Mix. Let everything cook for 2-3 mins.
Add in the coconut milk, stir and let it cook for another 5 mins. Add water. Mix.
Add in the the eggs, add chopped coriander leaves. Mix, cover and cook it for 10-12 mins on low flame.
Add in the garam masala, dried fenugreek leaves (kasuri methi) if using. Remove from heat and serve with flatbreads or rice.Enjoy!!!
Use whisked curd/yogurt instead of coconut milk.
Use of kasuri methi is optional but gives an amazing flavour to the dish. So I strongly recommend it.
Increase the quantity of water as per the desired consistency of gravy. Keyword Indian egg curry recipe, Egg recipes
Jun 13, 2021 | Desserts
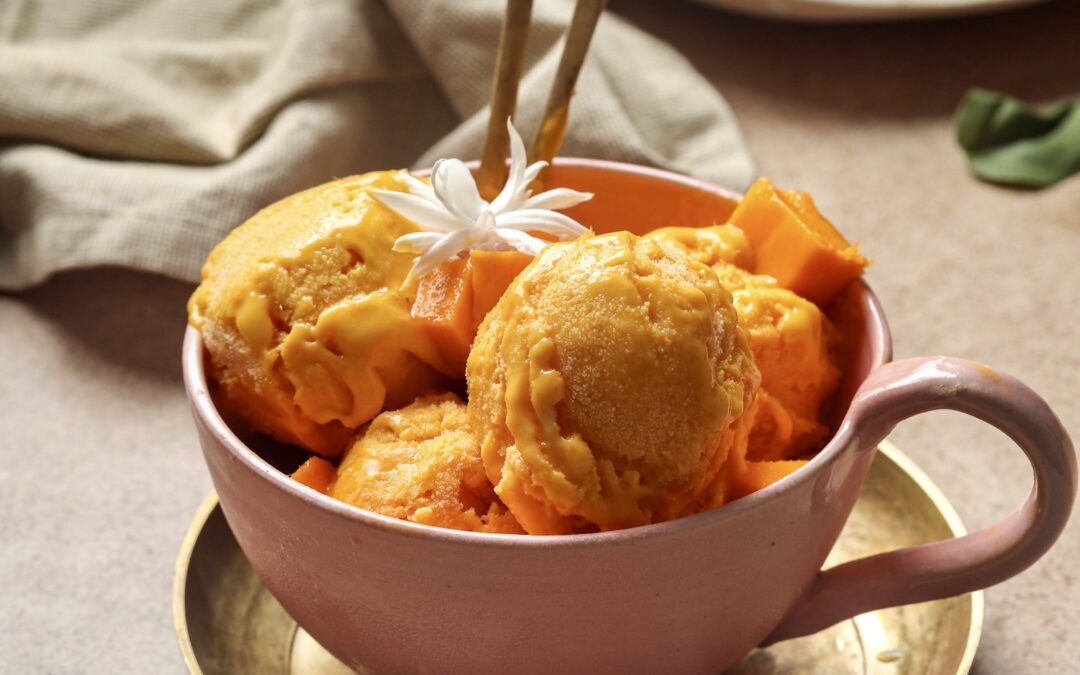
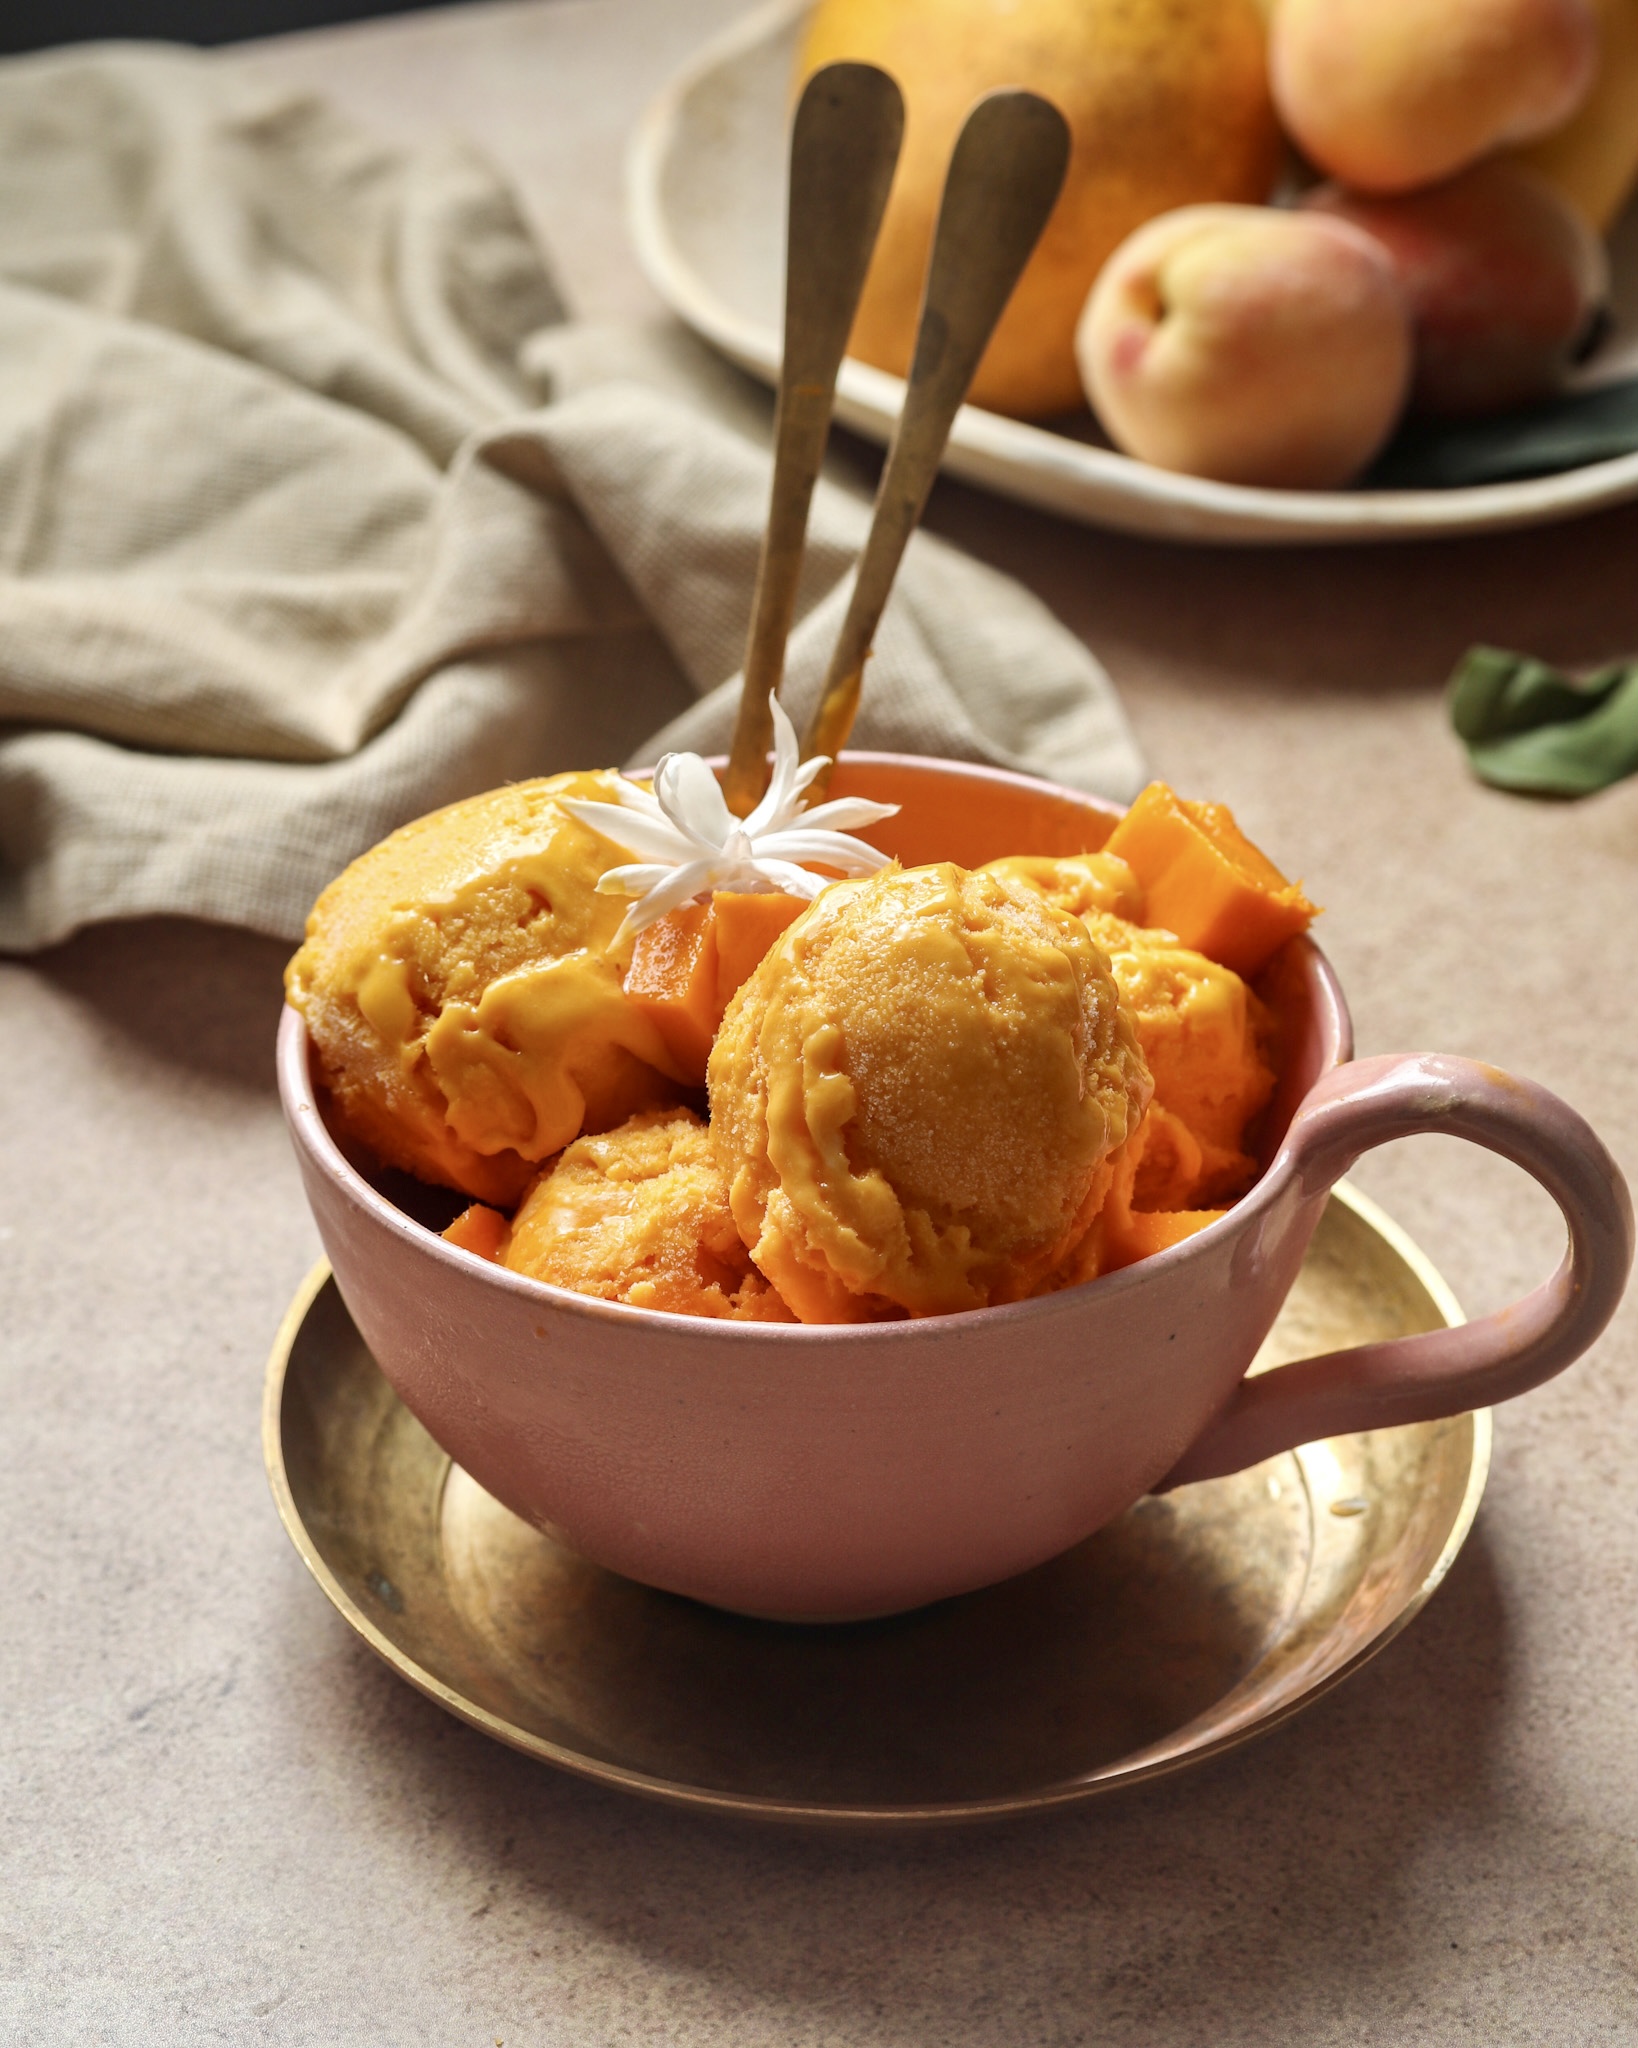
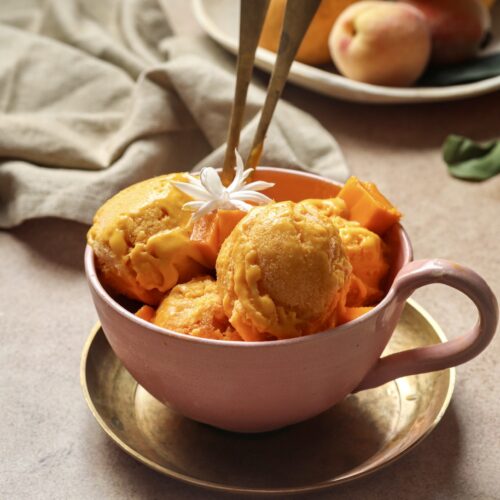
Mango And Peach No Churn Ice Cream.
This one is family’s favourite flavour in icecream. The tartness of peaches gets beautifully balanced with the sweetness of mangoes in this recipe. Furthermore, the use of condensed milk and fresh cream gives this no-churn ice cream a deliciously smooth texture. I have not added any more sweetener in this recipe because the mangoes I used were pretty sweet naturally. I will leave an optional note for the sweetener in the recipe details.Chunks of fresh mango and peaches are also added while setting the icecream. Oh, it takes the ice cream to a whole new level.
The secret to a good and creamy no churn icecream is a little extra effort of churning it at intervals. Though an extra effort, the results are pleasing and make it worthwhile.
This could be stored in the freezer for upto two months in an airtight container (only if you manage to save it for that long😀)
If you like this mango and peach no churn ice cream recipe, please let me know in the comments below or connect with me on my Instagram and Facebook handle.
You may also like –
Jamun & Chia Frozen Yogurt Popsicles
Peach Plum & Blueberry Galette
Mango And Peach Ice Cream
Delicious, home-made no churn ice cream
Prep Time 10 minutes mins
Freeze Time 6 hours hrs
Course Dessert
Cuisine Global
- 1 Cup Mango pulp
- 1/3 Cup Peaches Chopped
- 1/4 Cup Sweetened condensed milk Or more if desired
- 1/2 Cup Fresh cream
- 3 Tbsp Sugar (optional) use if the mangoes are sour
Churn together mango pulp and peaches and sugar (if using).
Whisk in condensed milk and fresh cream.
Transfer the mix in an air tight container and freeze for 2 hours.
Take it out, using a hand blender, blend it. Transfer again to the container and freeze again until set (you may repeat this process for smoother icecream). If not repeating the step then add mango and peach chunks in the ice cream mix. If repeating then add just before putting it in the freezer for the final set.
To serve - leave in the room temperature for a few minutes. Then scoop into bowls. Top it up with more mango chunks.Enjoy!!!
Keyword Mango and Peach no churn ice cream, ice cream recipe
Jun 11, 2021 | Mains
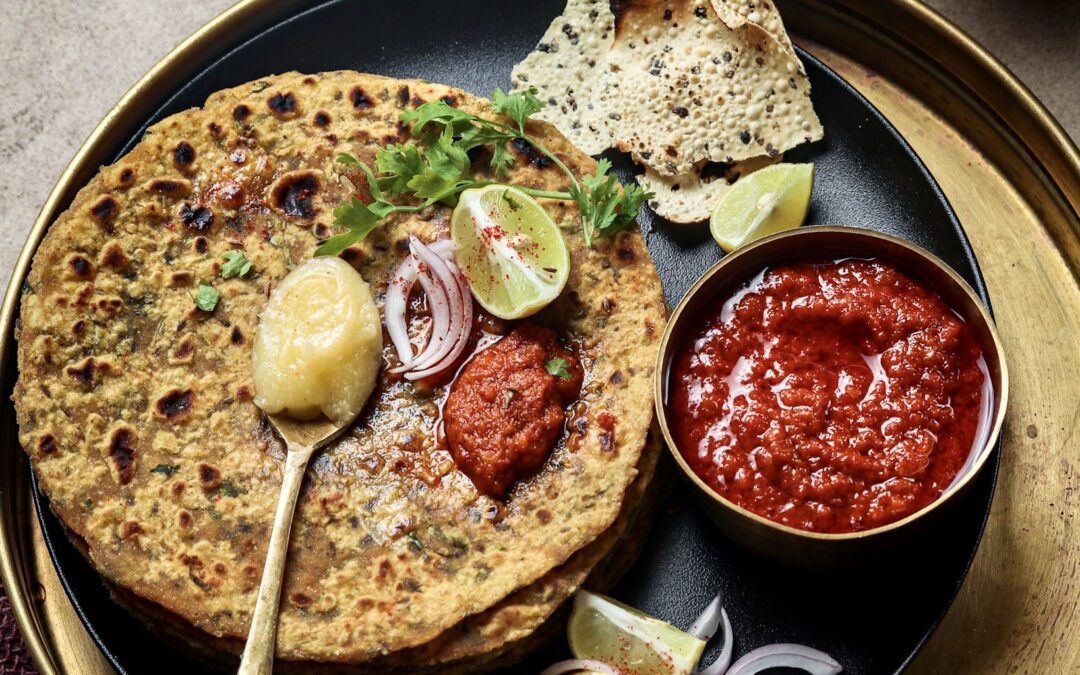
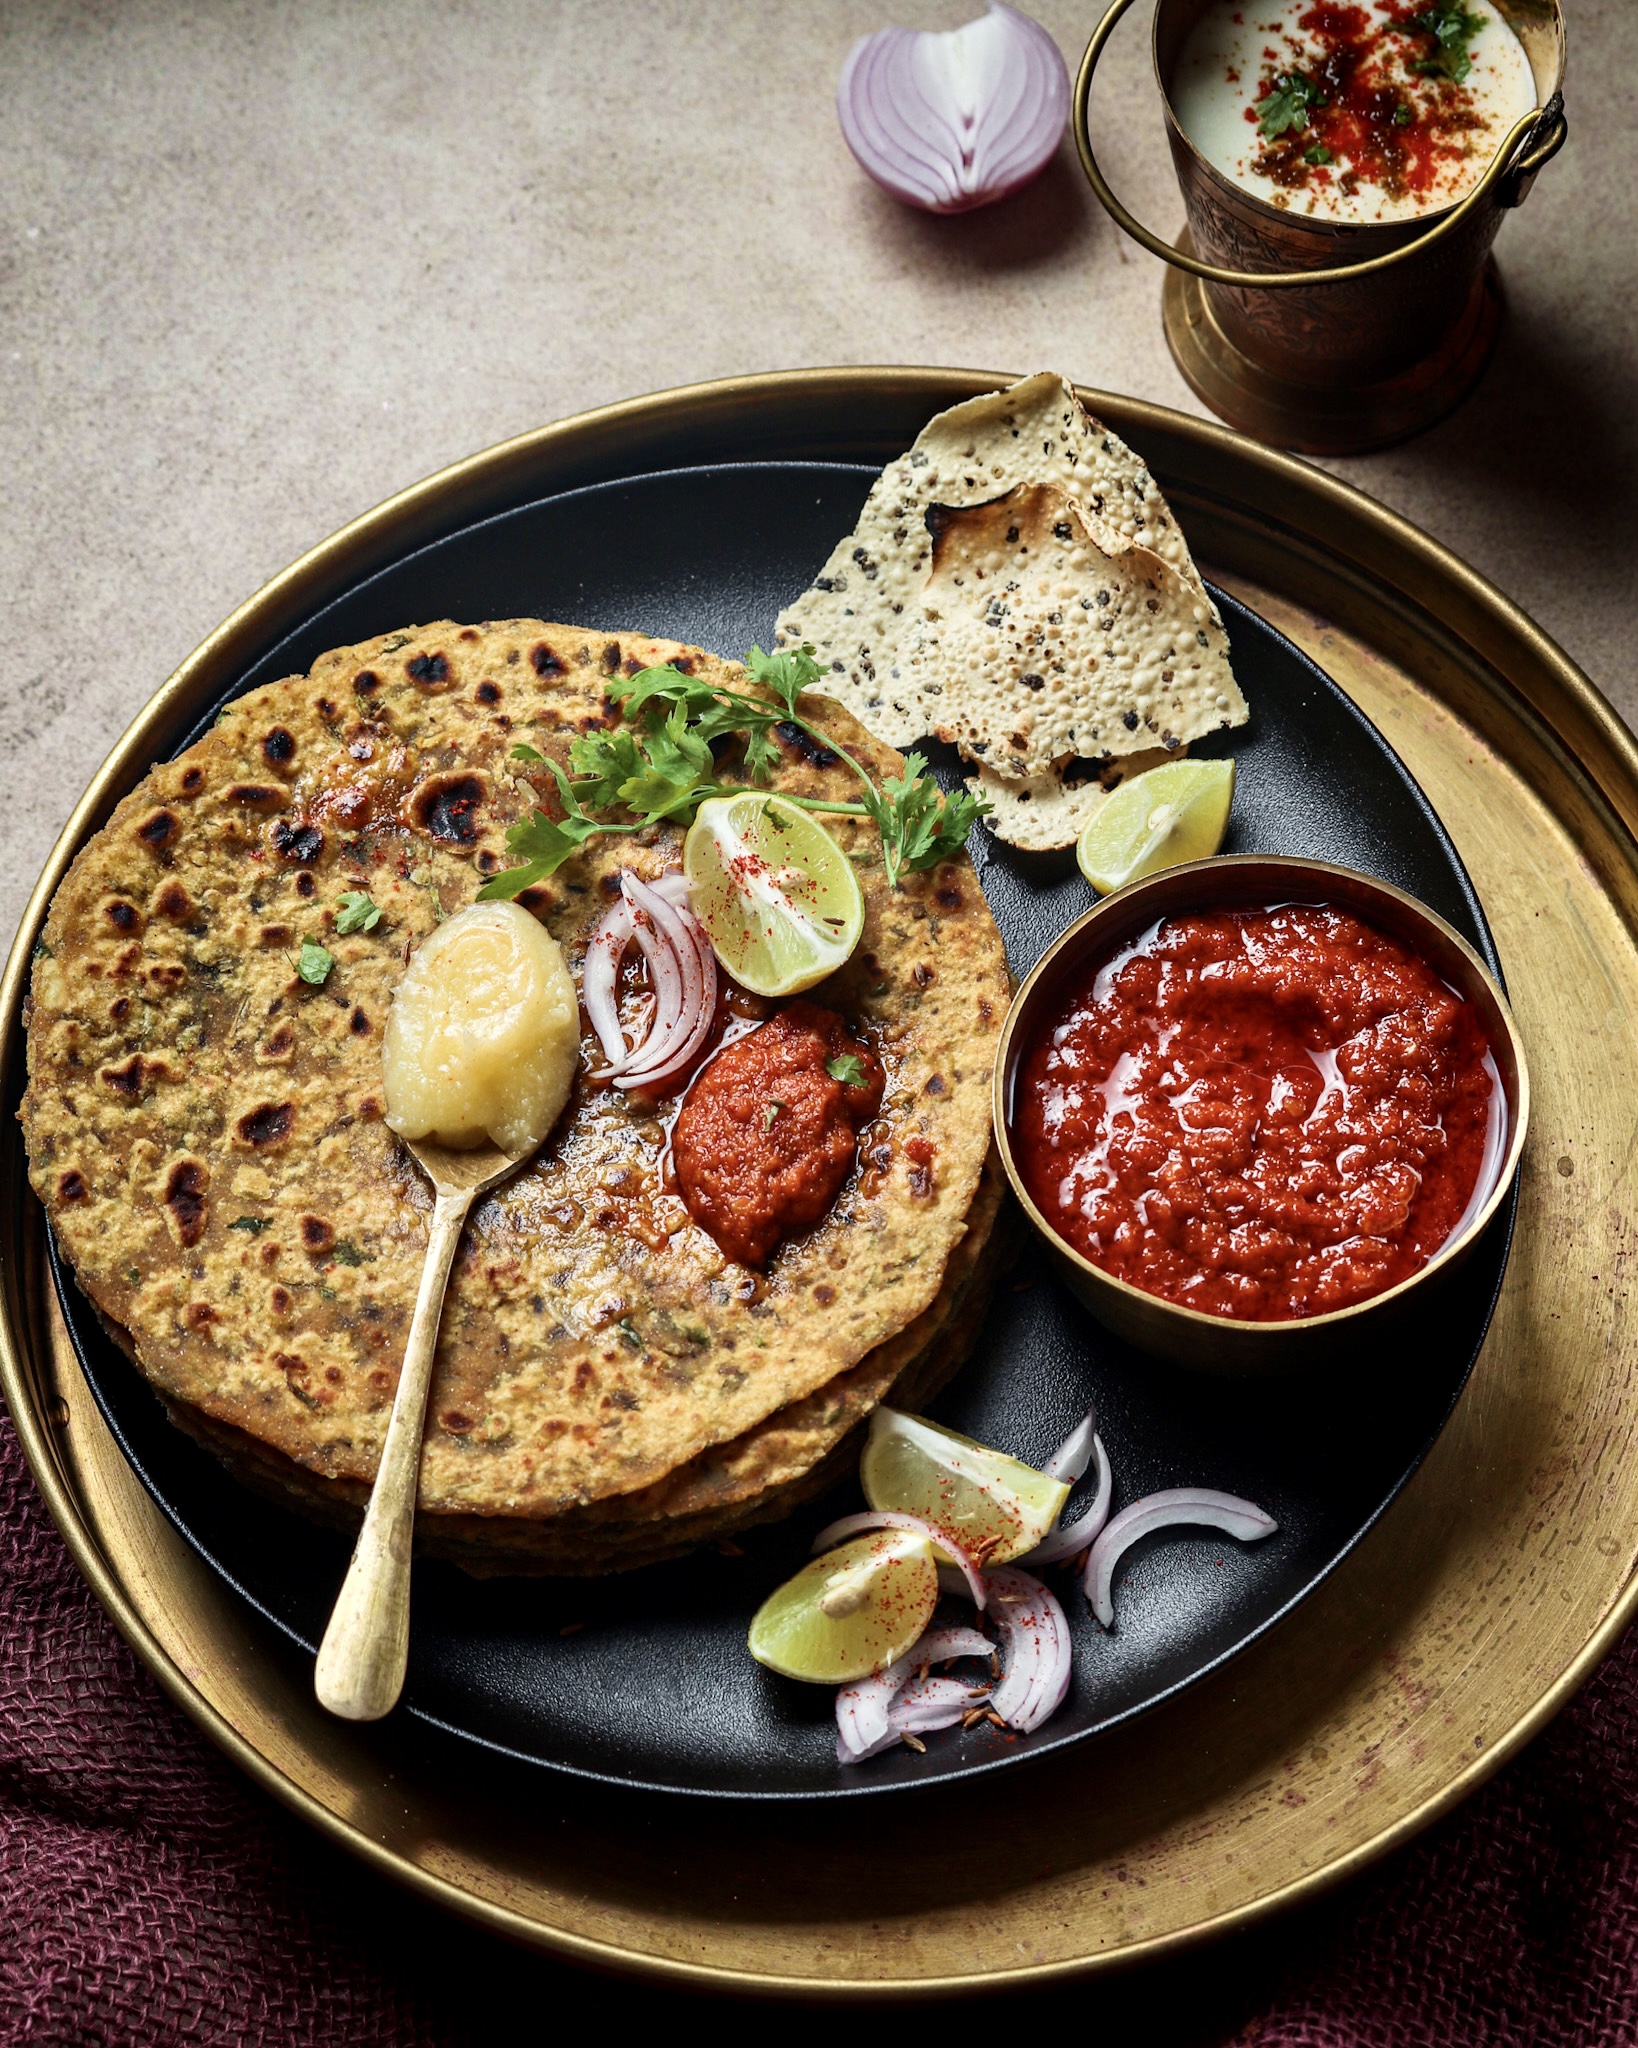
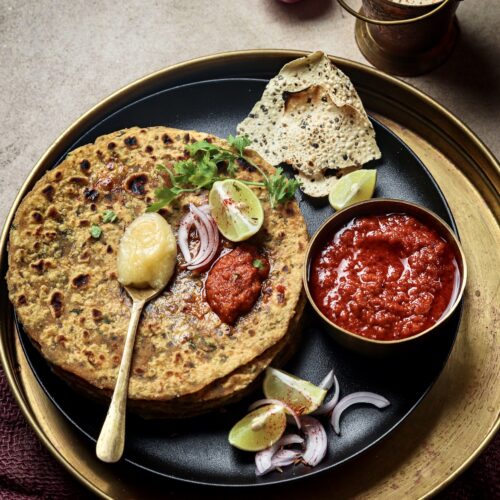
Rajasthani Moong Chilka Dal Paratha (Indian Lentil Flatbread).
Who doesn’t love a well cooked, spiced, ghee-laden parathas for breakfast, lunch or dinner? And when it is combined with Marwari hot garlic chutney, the flavours explode in your mouth. It’s sure to leave you wanting for more.
We love our parathas and since it’s made way too often in our kitchen, I love to try different ingredients and options. This one is made with whole wheat flour, cooked moong chilka dal (green split moong dal), loads of spices, garlic, ginger, green chillies, and coriander leaves. Cooked in ghee and served with onion, garlic chutney and lemon wedges. I make enough parathas to last us for a meal and breakfast. Oh, the joys of this kind of breakfast! Combine it with a cup of masala chai for the ultimate experience of this deliciousness.
This also works best with leftover dal or khichdi, which could be transformed into this delicacy the next day. Making the best out of the leftovers and making it interesting enough to be liked by everyone in the family.
Also, linking the recipe to Marwari hot garlic chutney here.
If you like this recipe of rajasthani moong chilka dal paratha, I would love to hear from you in the comments below or connect with me on my Instagram or Facebook handle.
Rajasthani Moong Chilka Dal Paratha (Indian Lentil Flatbread)
Arpita Darooka
Spiced ghee laden flatbread/paratha combined with hot garlic chutney.
Prep Time 15 minutes mins
Cook Time 20 minutes mins
Course Main Course
Cuisine Indian
- 1.5 Cups Whole wheat flour
- 1/2 Cup Cooked green split moong dal (moong chilka dal)
- 1/2 Tsp Turmeric powder
- 1.5 Tsp Cumin seeds
- 1 Tsp Red chilli powder
- 1 Tsp Coriander powder
- 1/2 Tsp Carom seeds (ajwain)
- 1/4 Tsp Fennel seeds Crushed
- 1/4 Tsp Garam masala
- Salt to taste
- 1 Tbsp Garlic Minced
- 1 Inch Ginger
- 1/4 Cup Coriander leaves Chopped
- 1 Tsp Green chillies Crushed
- Water As required
- Ghee As required
Pressure cook 1/2 cup moong chilka dal with 1.5 cups water, salt and 1/4 tsp turmeric powder. Let the steam release naturally and let it cool.
In a pan, heat a tbsp ghee, add 1 tsp cumin seeds, ginger and garlic. Sauté until the garlic and ginger changes colour. Remove from heat and let it cool.
Mix all the ingredients and the sautéed garlic and ginger together except more ghee. Using the water as required, knead it into a soft dough. Cover and let it rest for 15 mins.
Divide the dough into 12 equal parts. Now using dry flour, roll them into shape of paratha.
Heat a griddle and cook the paratha from one side until light brown spots appear. Flip and apply ghee. Let it cook for 30 seconds. Flip again and apply ghee. Flip and cook for another 30 seconds. Repeat with all the parathas.Enjoy!!!
Keyword Indian lentil flatbread recipe, paratha recipe, rajasthani moong chilka dal paratha
Jun 8, 2021 | Mains
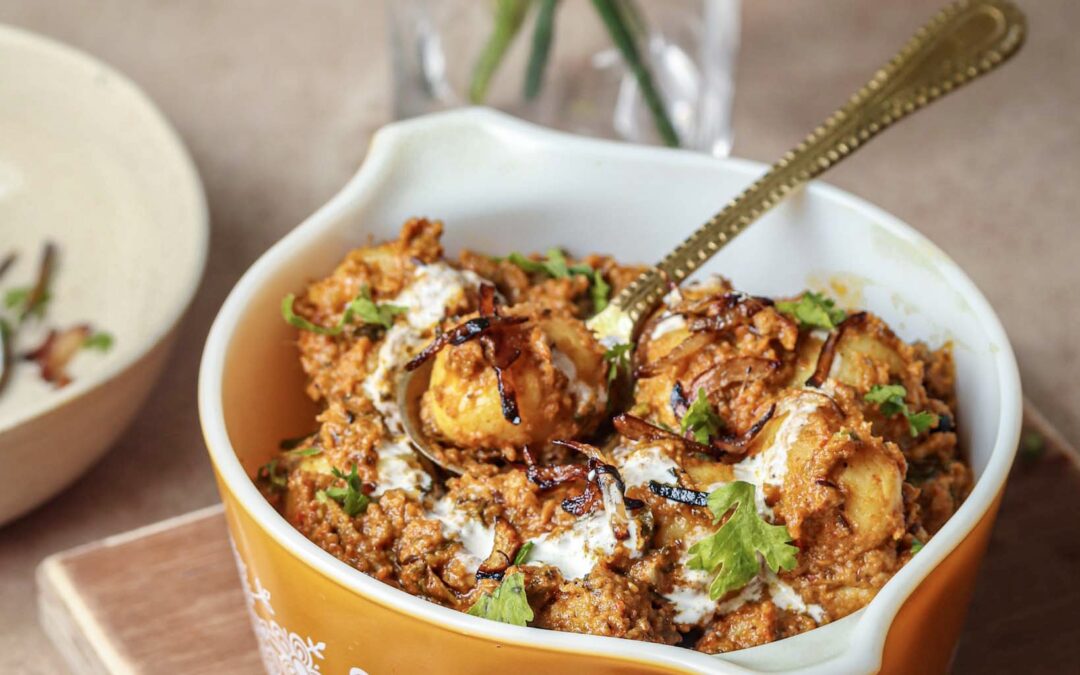
Indian Dum Aloo
We woke up to a beautiful rainy morning and after a while the husband demanded dum aloo for lunch. I have almost lost the count, how often I used to make this until a year ago for every get together. This recipe is a keeper and a crowd pleaser.
A delicious recipe of baby potatoes cooked in a rich onion gravy, made in various ways in Indian cuisine. Different regions in India have their own ways of making this recipe. My family favourite being this this one. If baby potatoes are not available, use large potatoes cut in quarters. The flavour game changer here is use of ghee while cooking, additional tempering with spices and addition of caramelised onions.
I have a very unconventional way of adding garlic tempering and caramelised onions as garnish. Believe me, that’s absolutely non negotiable. It adds a great texture to the dish. This gravy is made with onions and yogurt and the fresh cream is used only in the garnish.
If you like Indian dum aloo this recipe, let me know your thoughts in the comments below or connect with me on my Instagram and Facebook handle.
You may also like –
Indian Kadhai Paneer
Indian Matar Paneer Gravy
Indian Dum Aloo
Arpita Darooka
Onion and yogurt gravy simmered with Indian spices.
Prep Time 10 minutes mins
Cook Time 40 minutes mins
Course Main Course
Cuisine Indian
- 500 Gms Baby potatoes
- 5-6 Pcs Dry Kashmiri red chillies
- 7-8 Cloves Garlic
- 1 Inch Ginger
- 2 Tbsp Ghee
- 2 Tbsp Oil
- 1/2 Cup Onion purée/paste
- 1/2 Cup Yogurt Whisked
- 1/2 Tsp Turmeric powder
- 1 Tsp Red chilli powder
- 1/2 Tsp Cumin powder
- 1 Tsp Coriander powder
- Salt to taste
- 1.5 Cups Water
- 1/4 Cup Coriander leaves chopped
- 1 Tsp Sugar
- 1/4 Tsp Raw mango powder or anardana powder
- 1/2 Tsp Kasuri methi
- 1/2 Tsp Garam masala
- 1 Tsp Dried mint Crushed
- 1/4 Tsp Crushed fennel seeds
Whole spices
- 3-4 Pcs Cloves
- 6-7 Pcs Black Peppercorns
- 3 Pcs Green cardamom
- 1 Pc Black cardamom
- 1 Pc Star anise
- 1/2 Inch Cinnamon stick
- 1 Tsp Cumin seeds
Tempering
- 1 Tbsp Ghee
- 1 Tsp Cumin seeds
- 2 Tbsp Garlic Minced
- 1/2 Tsp Red chilli powder
- 2 Tbsp Water
Caramelised onion
- 1 Tbsp Oil
- 1 Pc Onion small sized Sliced
Garnish
- Fresh cream, coriander leaves, caramelised onions
Pressure cook baby potatoes to one whistle (almost half cooked). Peel and prick them with a fork.
Soak dry kashmiri chillies (remove seeds) and garlic cloves in hot water for 30 mins. After its soaked, discard the water and grind them to a fine paste. Add in the ginger and churn again.
Heat 1 tbsp oil and 1 tbsp ghee in a pan, add the potatoes and sauté them on medium low flame for 5-7 mins or until the potatoes turn golden brown. Take them out of the pan and keep aside.
In the same pan, heat another tbsp oil and 1 tbsp ghee. Add whole spices and sauté until fragrant.
Add onion paste and sauté for another 2 mins. Add the garlic and red chilli paste. Cook until the raw smell goes way (approx 6-7 mins). Add the dry spices - turmeric powder, red chilli powder, cumin powder, coriander powder and crushed fennel seeds. Mix everything well.
Add whisked curd and stir until it masala releases oil. Let it cook for another 3 mins. Add salt to taste.
Add in the potatoes, cook for 2 mins on medium high flame. Add water. Add in chopped coriander leaves, sugar and raw mango powder. Mix.
Cover and seal the edges of the lid. Let it cook on slowest flame for 20-25 mins. Remove the lid, add kasuri methi and garam masala. Mix in crushed dried mint. Mix and taste. Adjust seasoning if required.
To caramelise onions - In another small pan, heat oil and add sliced onions. Let it cook on low flame until the onion caramelises. Remove from the pan.
In the same pan, heat ghee for tempering. Add cumin seeds ad garlic and sauté until the garlic begins to change colour. Add in the red chilli powder, mix and then add water. Let it be on flame until the ghee floats on top. Add this to the potato gravy and mix.
Garnish and enjoy!!!
Keyword Indian Dum Aloo recipe, Indian potato gravy, Onion and yogurt gravy, Dum aloo photography